Let's Dive in ~
Contents
- Requirements
- Setting Up Mobile Peneteration Testing Lab Using Mobexler
- Connecting Android Physcial device with Mobexler
- Connecting iOS Physical device with Mobexler
- Setting Up Genymotion As a Test Device/Emulator
- Setting Up Corellium Virtual Device As a Test Device/Emulator
- Connecting Corellium Android device using Mobexler
- Connecting Corellium iOS device using Mobexler
- Video Walkthrough
Requirements
- Hard Disk: ~25 GB
- RAM: 2 GB min
- iOS device:
- Real iPhone/iPad, preferrably jailbroken
- Using Corellium platform for virtual test devices
- Android device:
- Real android devices. preferrably rooted
- Android virtual devices running on host machine
- Using emulators like Genymotion
- Using Corellium platform for virtual test devices
Setting Up Mobile App Penetration Testing Lab Using Mobexler
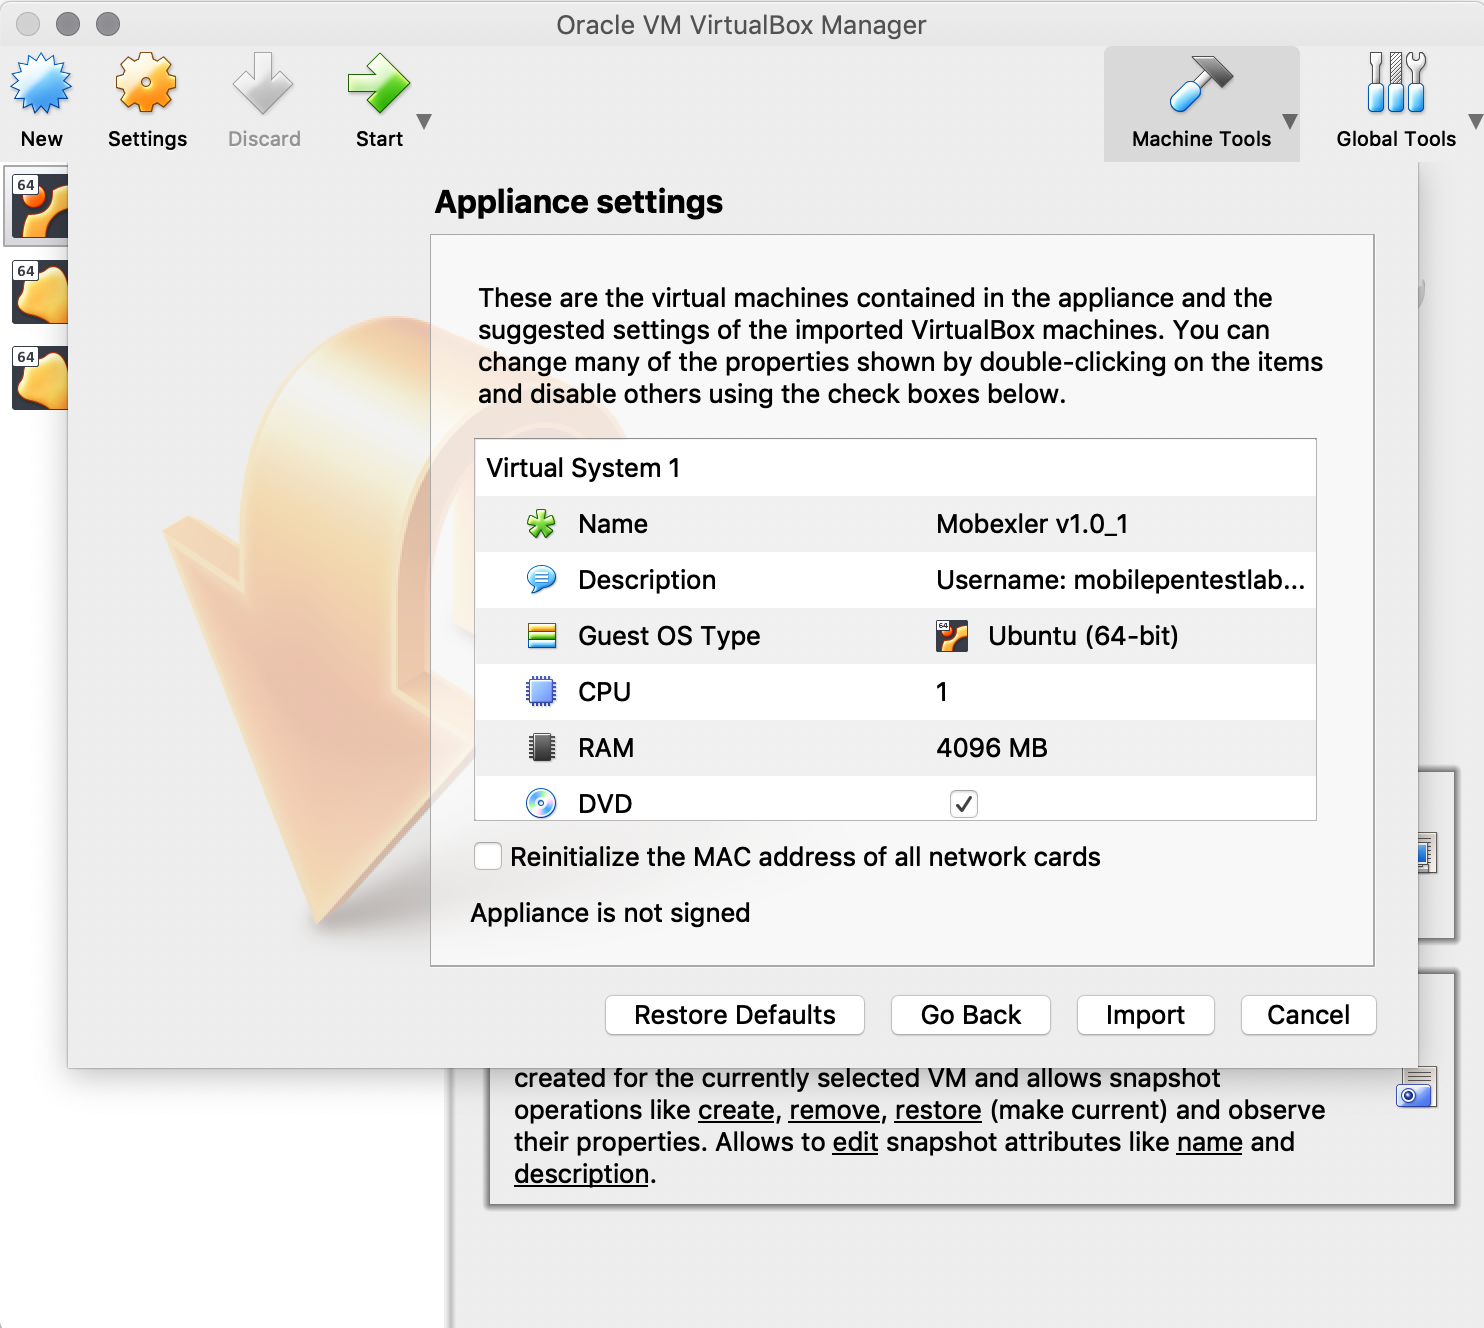
- The first step is to download the Mobexler OVA file and importing it as a virtual machine using virtualization softwares like VrtualBox or VMware etc.
- If you are using VirtualBoxOnce, go to File → Import Appliance → Select the Downloaded OVA file → Click Import.
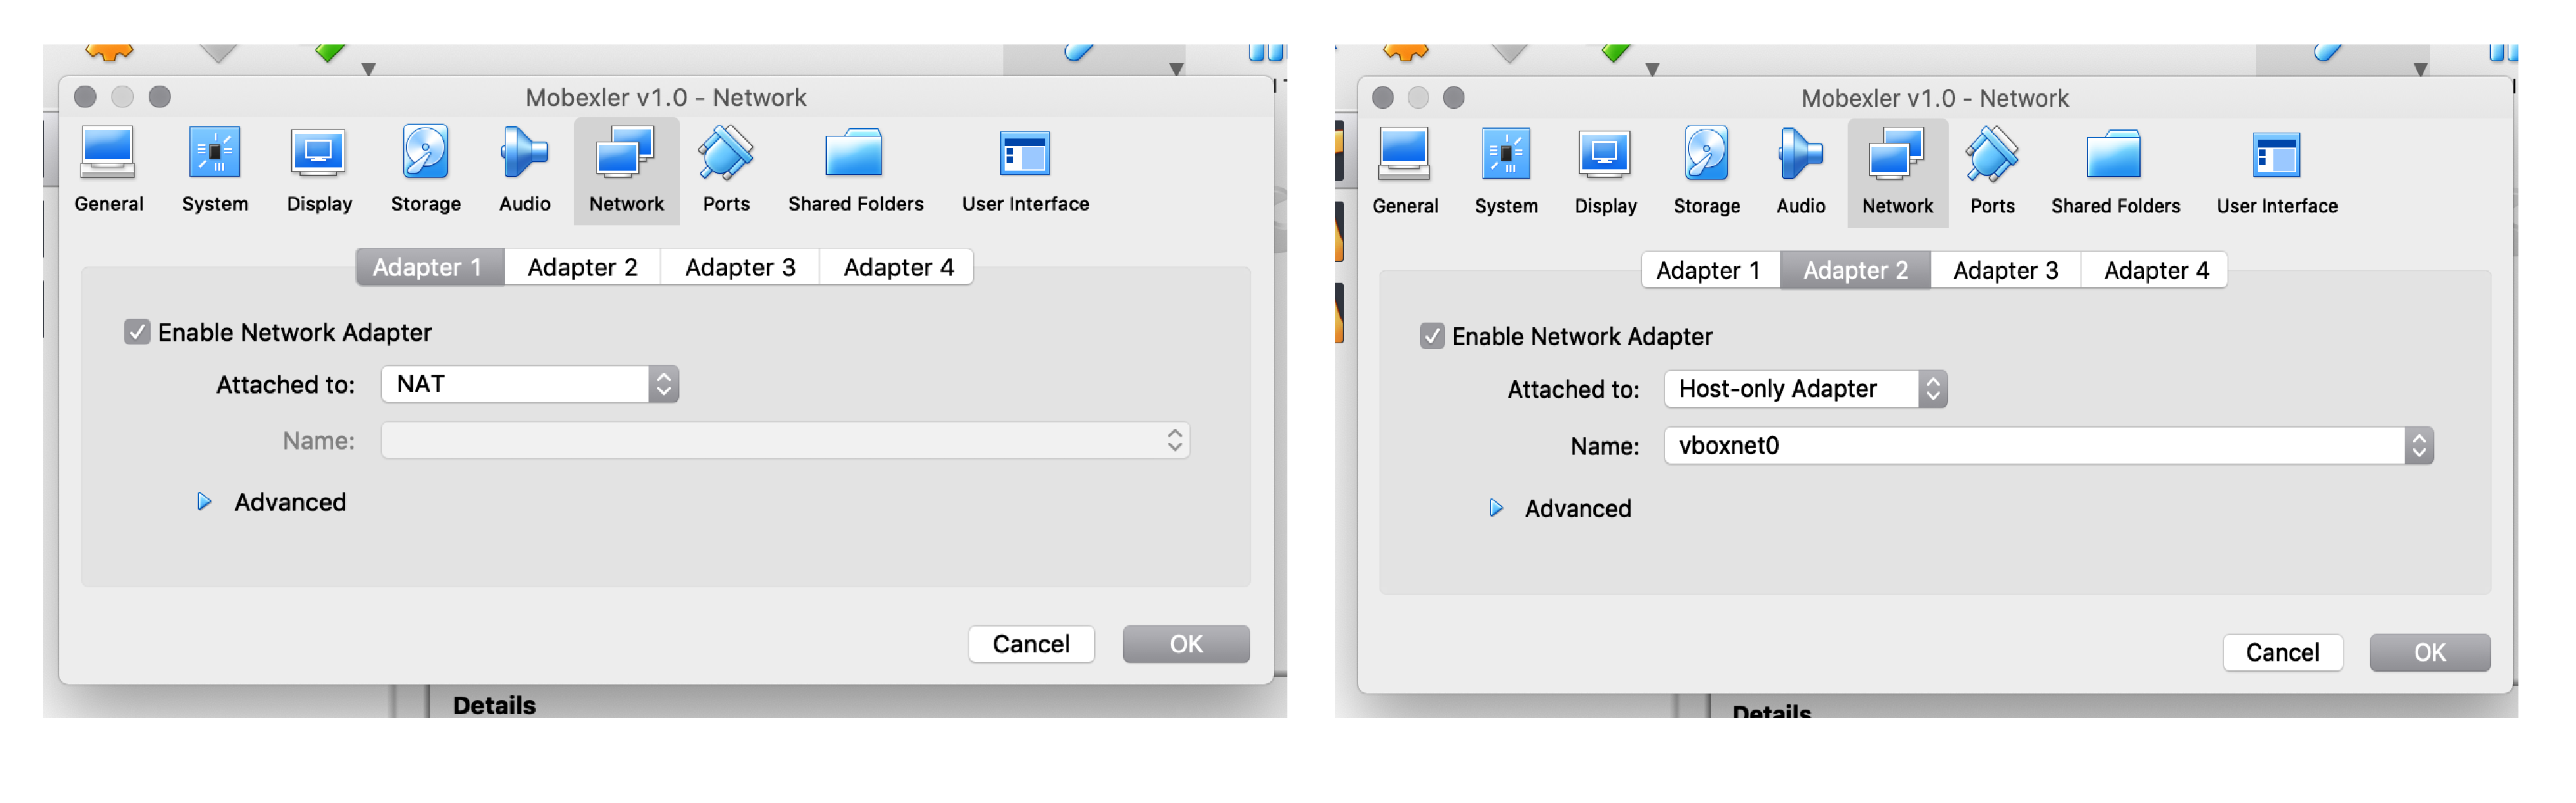
- Once the virtual box image has been imported successfully, go to Mobexler v1.0 → Settings → Network and confirm that one of the network cards has NAT and other has Host Only Adapter connection.
Note: The name of Host Only Adapter can change depending upon the operating system you are using and the name you have given to it.
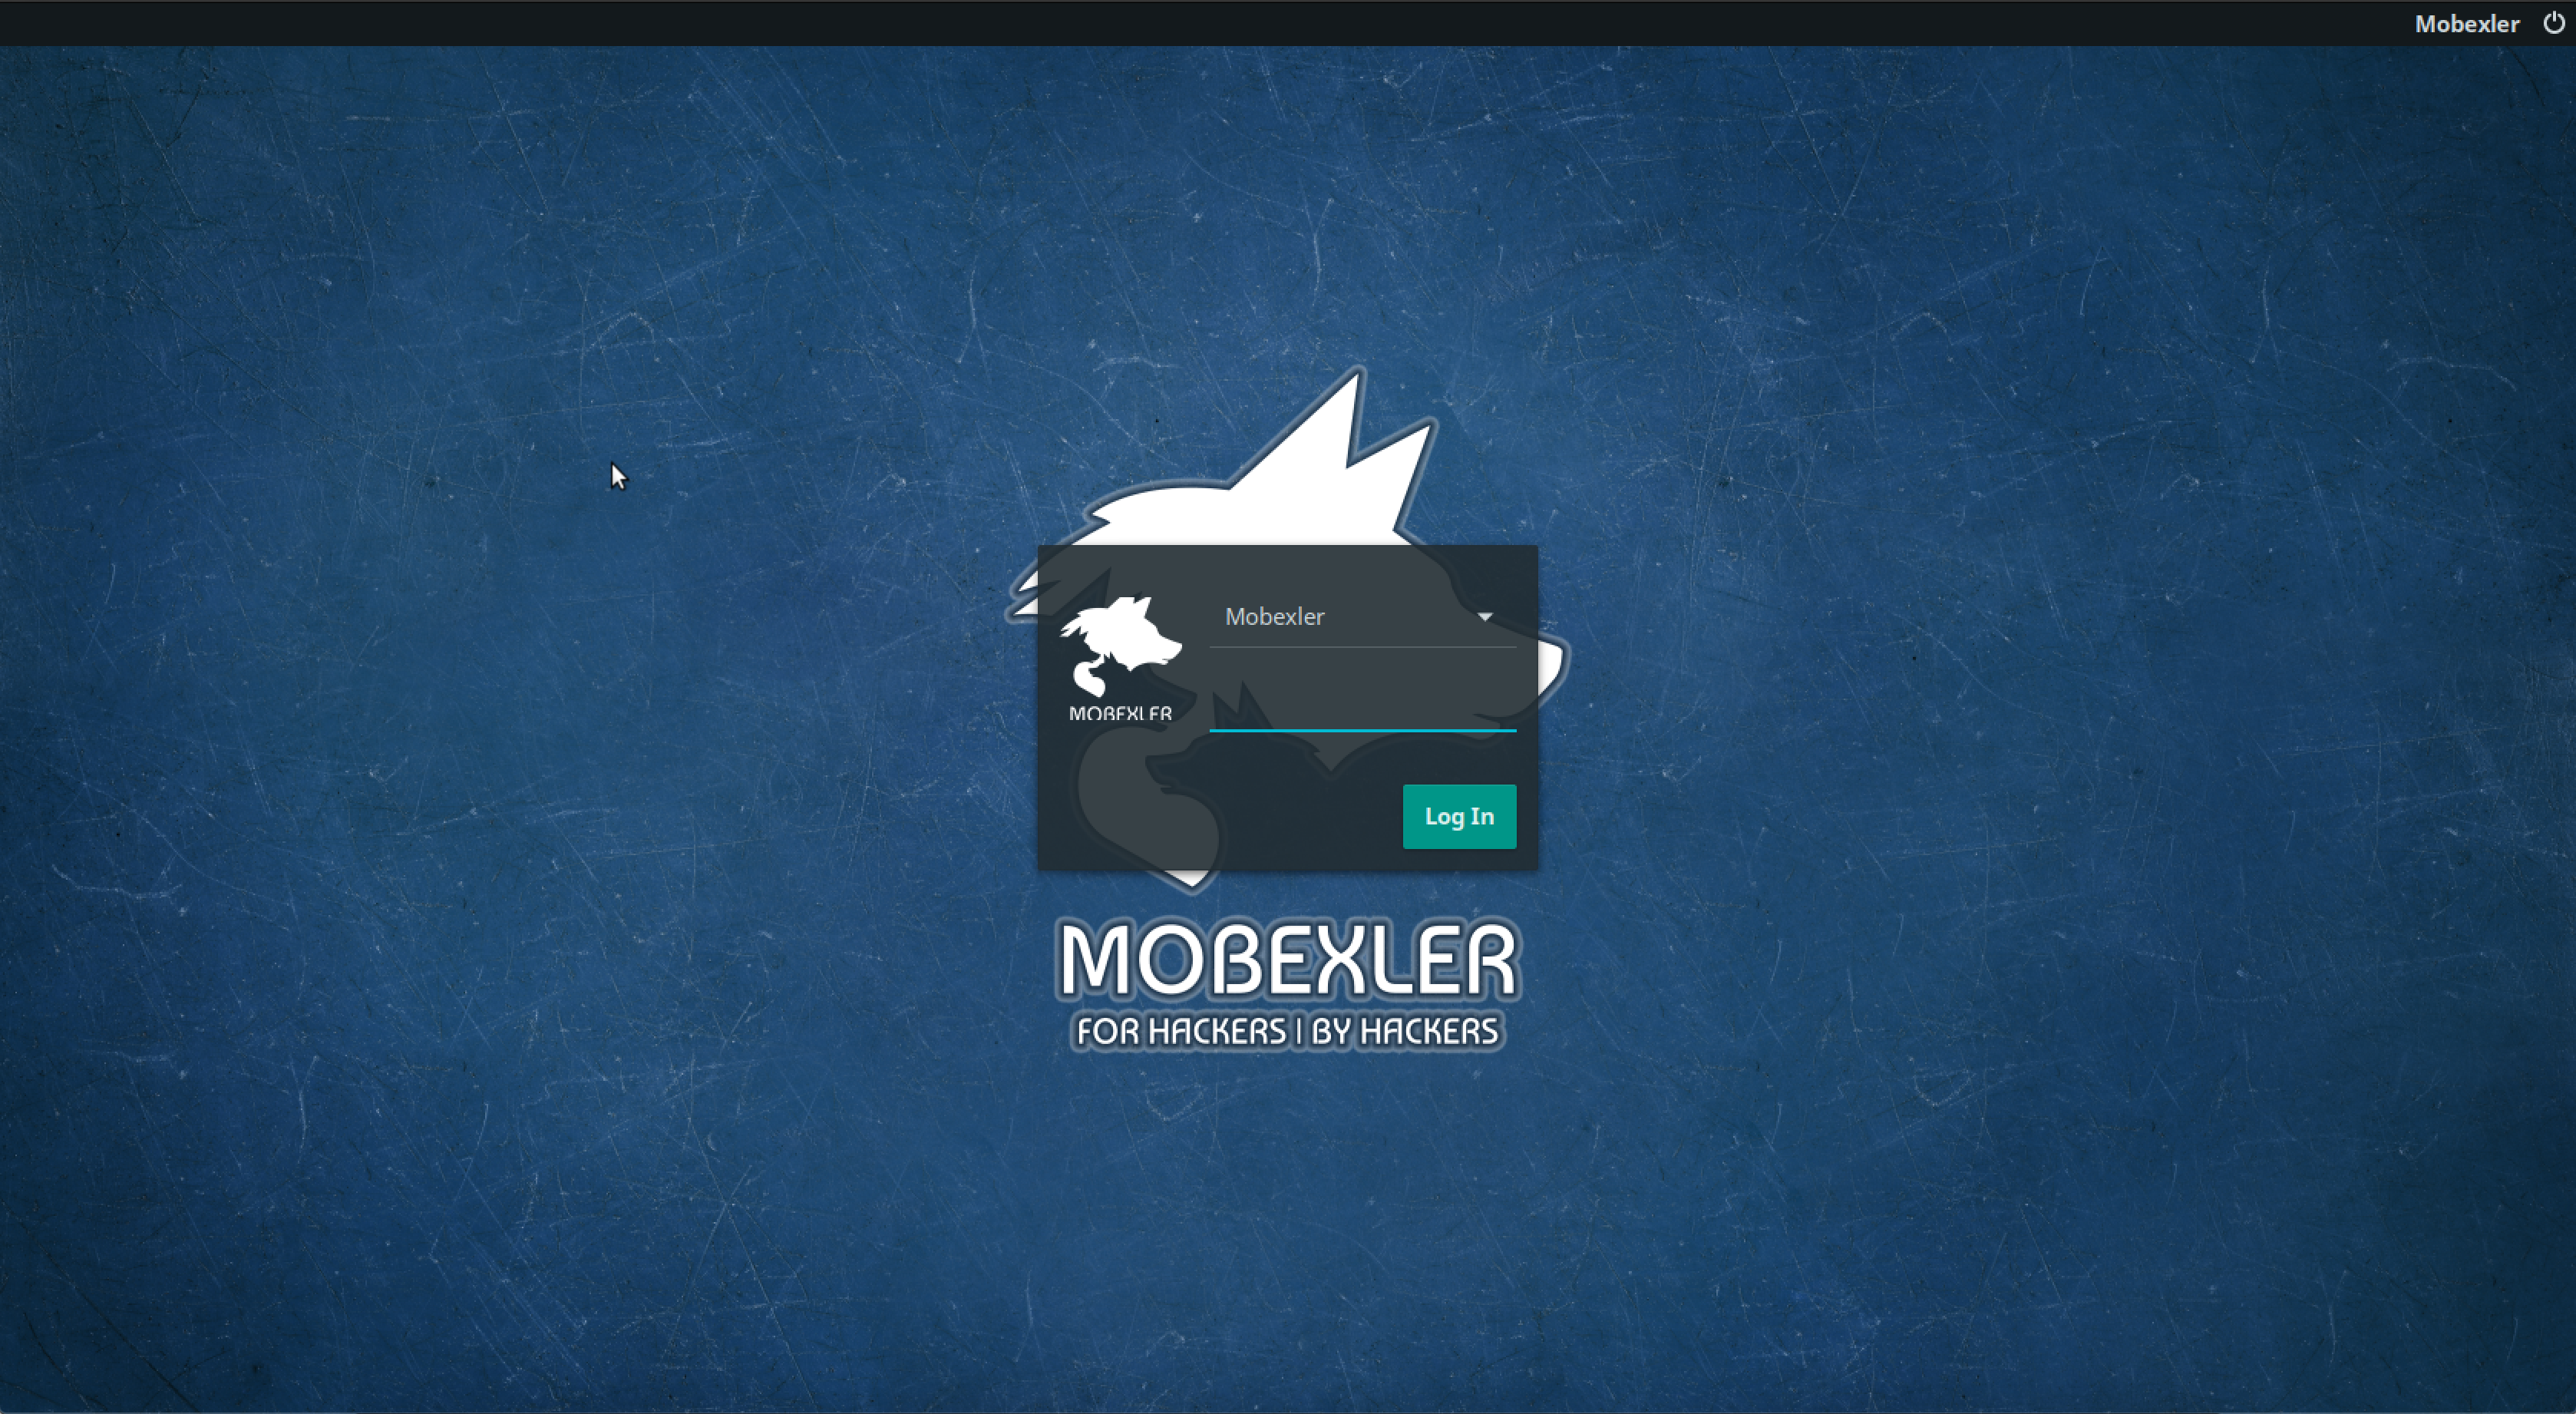
- Start the Mobexler virtual machine, and login with the password: `mobexler`
- Once logged in, verify if you can connect to the internet. Go to Applications → Internet → Launch Firefox and open any website.
Note: Mobexler comes preinstalled with Android Studio. But because of the limitation of running an ARM based emulator inside the virtualbox, the emulator becomes extremely slow (10 times slower). Due to this reason, we strongly suggest setting up the lab using Genymotion as the emulator, or using any real android device as the test device.
Connecting Android Physical Device With Mobexler
Using VMWare Player/Workstation/Fusion
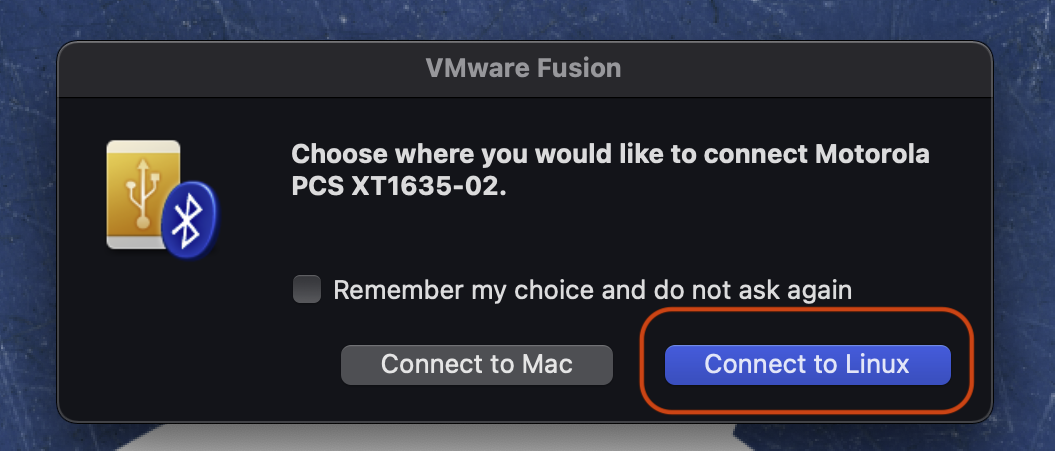
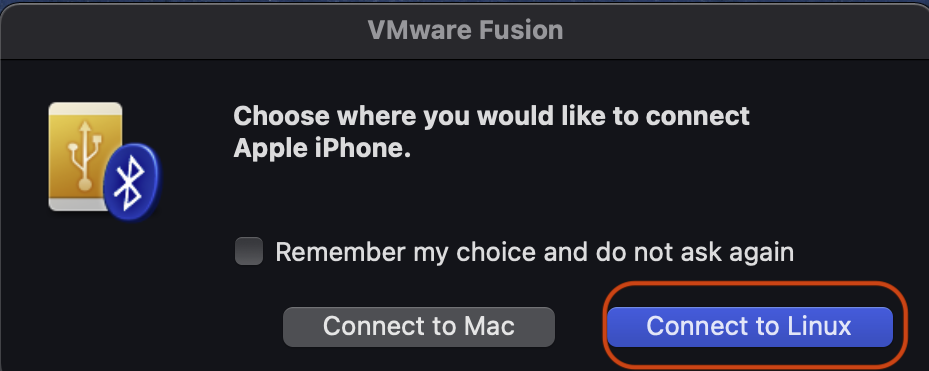
- Connect your USB cable to your system → Click on Virtual Machine → Removable Device → Android Device, and connect your Android Device to Mobexler Virtual Machine by clicking on Connect to Linux Prompt.
- Connect your USB cable to your system → Start or go to VM. Right Click USB Icon in the VM Status Bar at bottom of screen, OR from Menu go Devices > USB Devices, and select Android device.
- Once done open terminal → Enter Command "$: adb devices" , that should list out your Android connected device.
Using Virtualbox

Connecting iOS Physical Device With Mobexler
Using VMWare Player/Workstation/Fusion
- Connect your USB cable to your system → Click on Virtual Machine → Removable Device → iPhone Device, and connect your iOS Device to Mobexler Virtual Machine by Clicking on Connect to Liux.
- Connect your USB cable to your system → Start or go to VM. Right Click USB Icon in the VM Status Bar at bottom of screen, OR from Menu go Devices > USB Devices, and select iOS device.
- Connect your USB cable to your system → Click on Virtual Machine in case you are using VMWare → Removable Device → iPhone Device , and connect your iOS Device to Mobexler Virtual Machine.
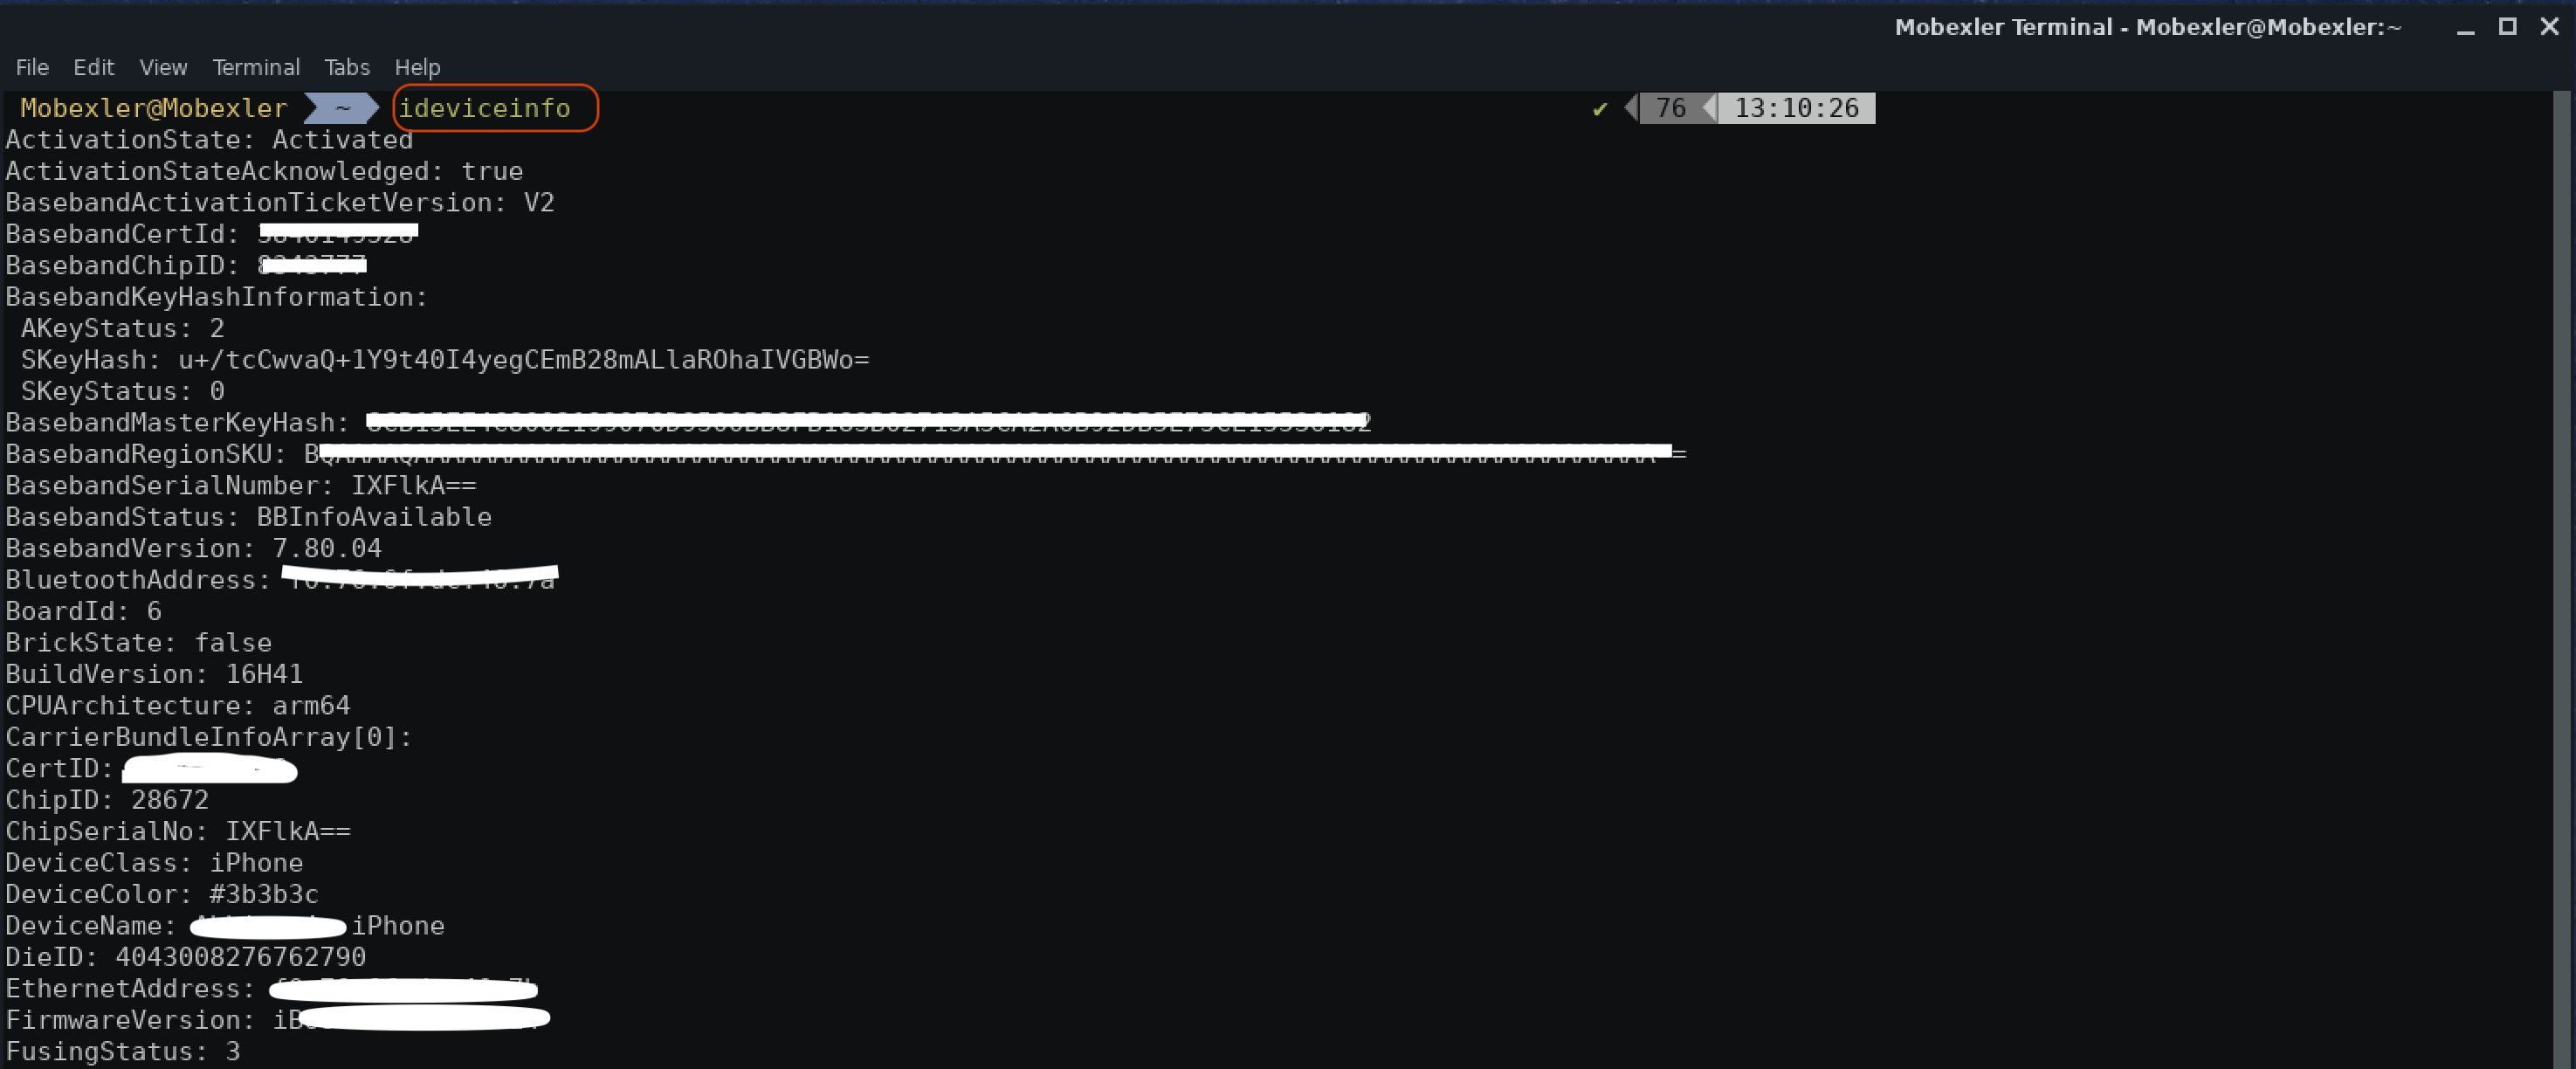
- Once done open terminal → Enter Command "$: ideviceinfo" , that should list out your iOS device information.
Using Virtualbox
Setting Up Genymotion As a Test Device
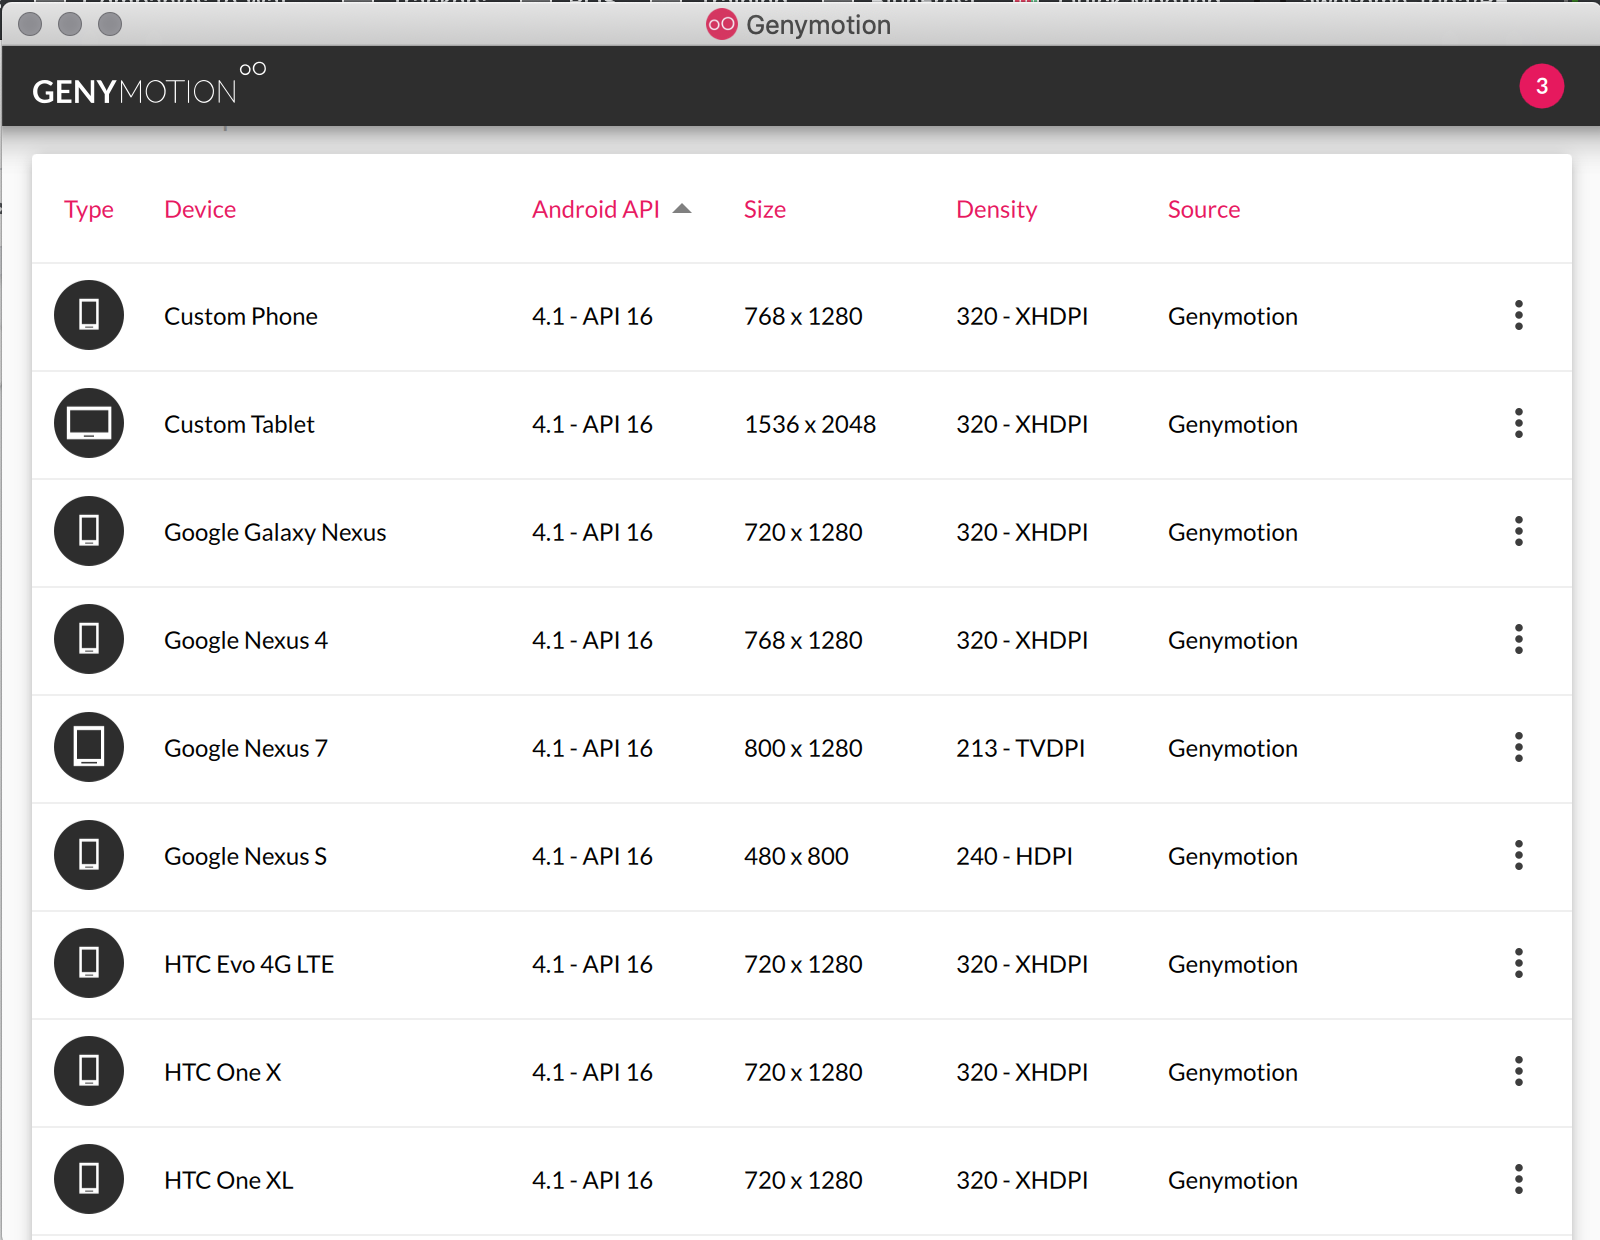
- Go to the Genymotion Website and download a “Genymotion For Fun” application → Genymotion For Fun.
- Installed the downloaded application, register/sign in to free account and launch “Genymotion” from application/program list. Note: For testing, you are free to download and setup any available genymotion image. In this tutorial, we will use “Google Nexus 5X - 7.0 API 24”.
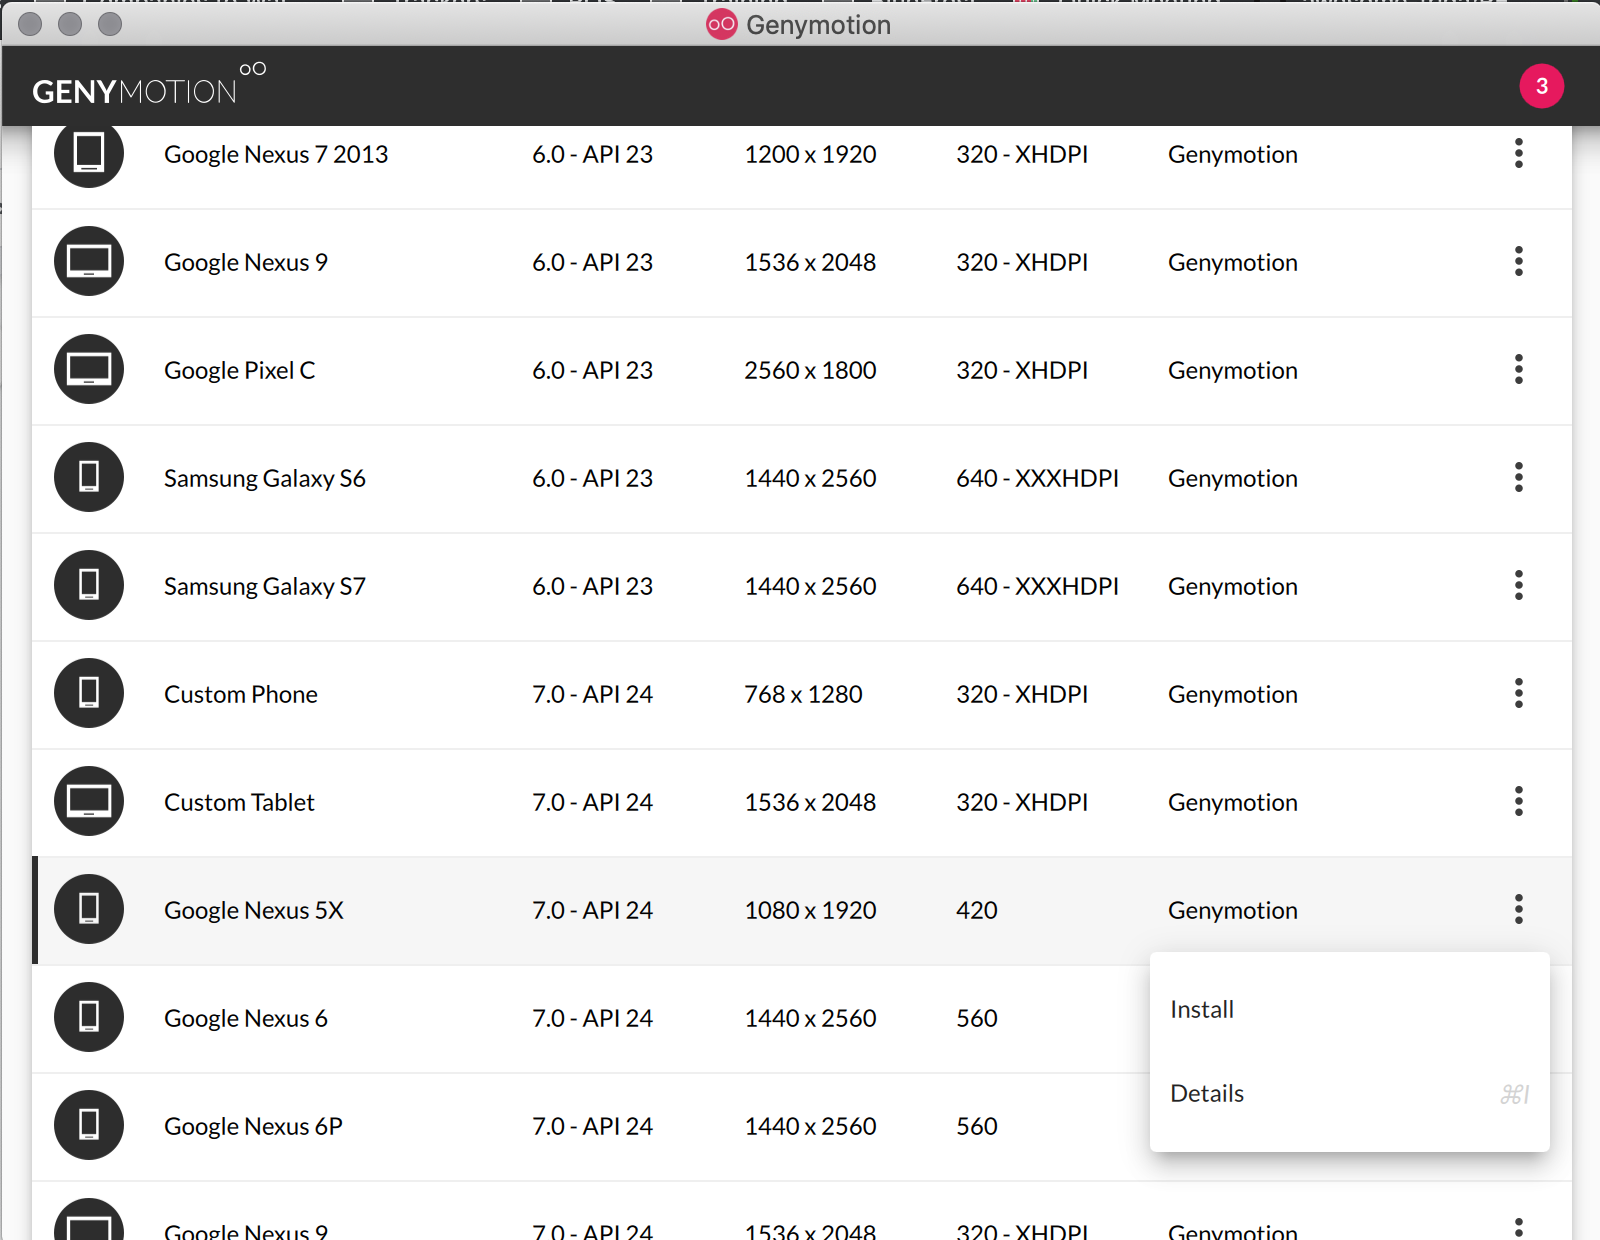
- Now from the genymotion application, select the device “Google Nexus 5X - 7.0 API 24” → Install
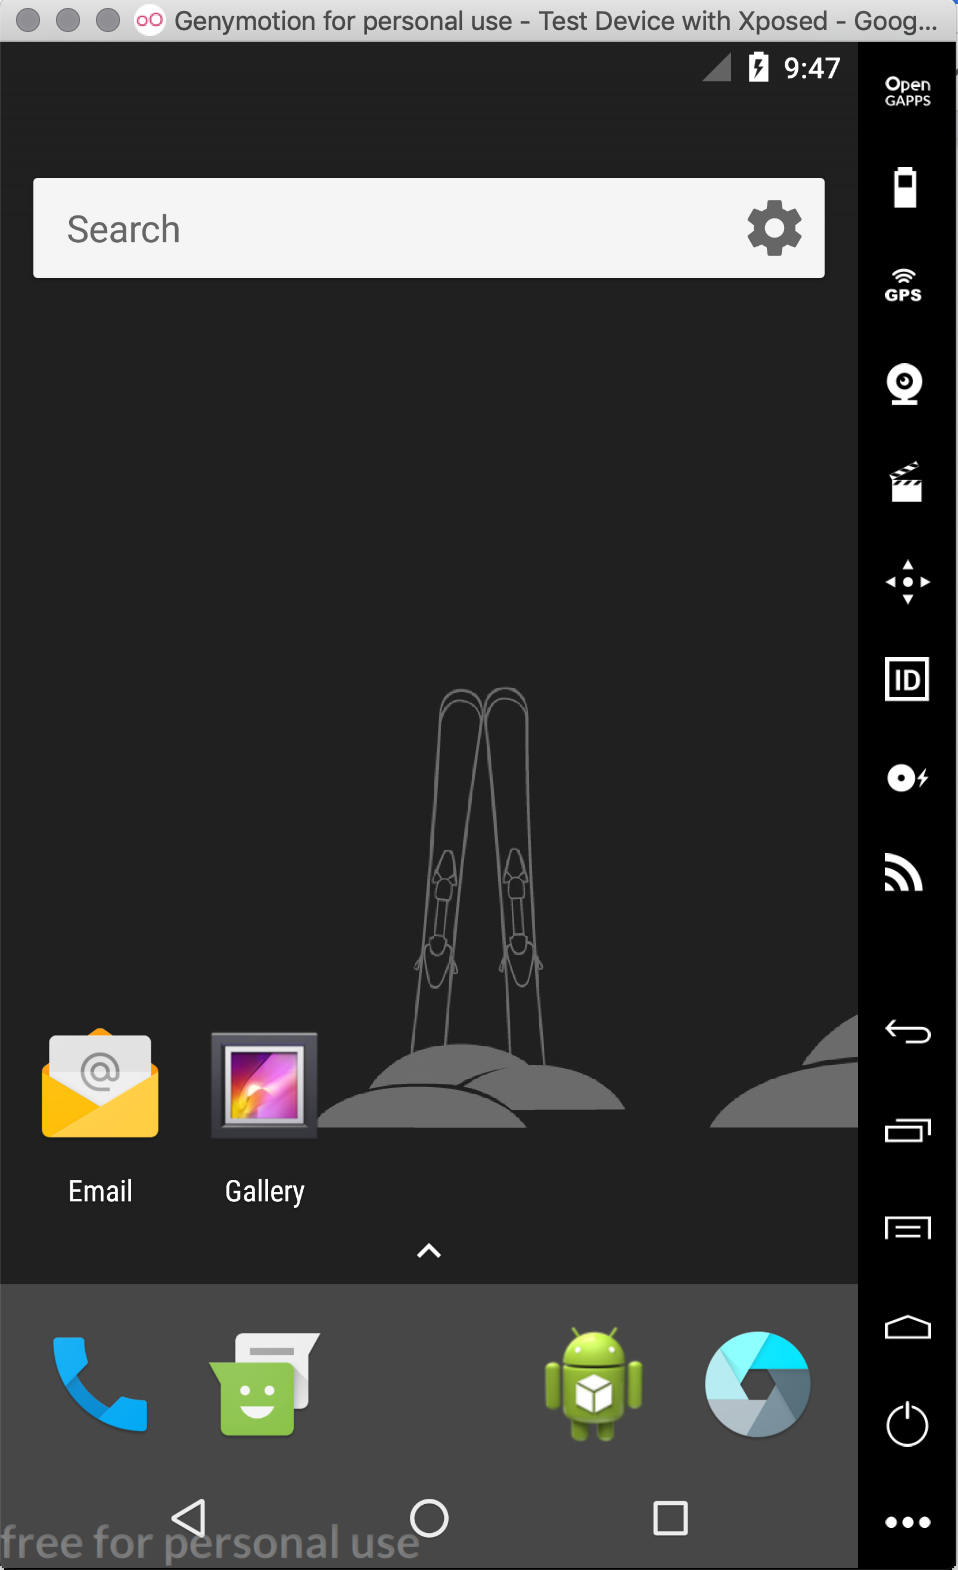
- Once the Genymotion device image has been downloaded, run the image to make sure it’s working fine.
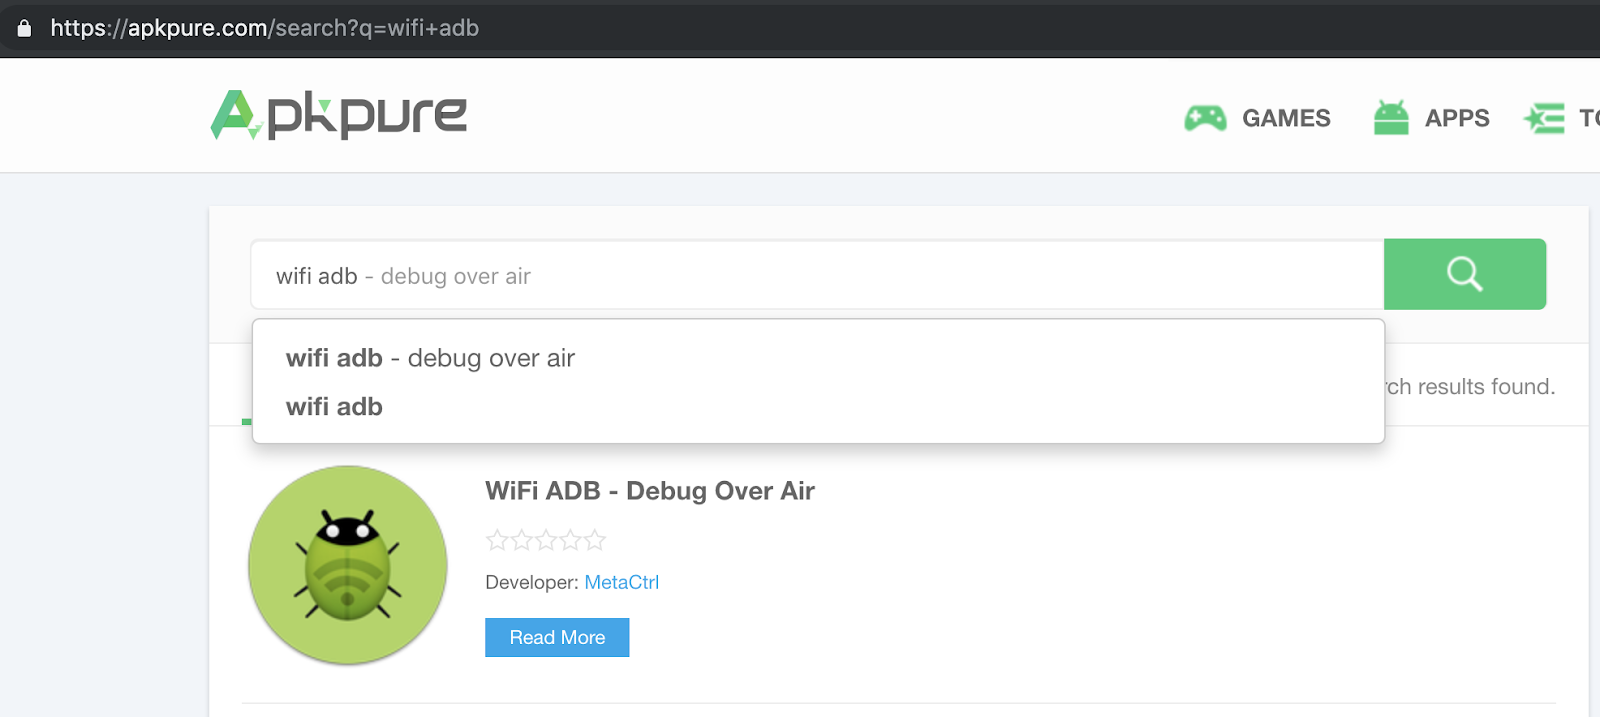
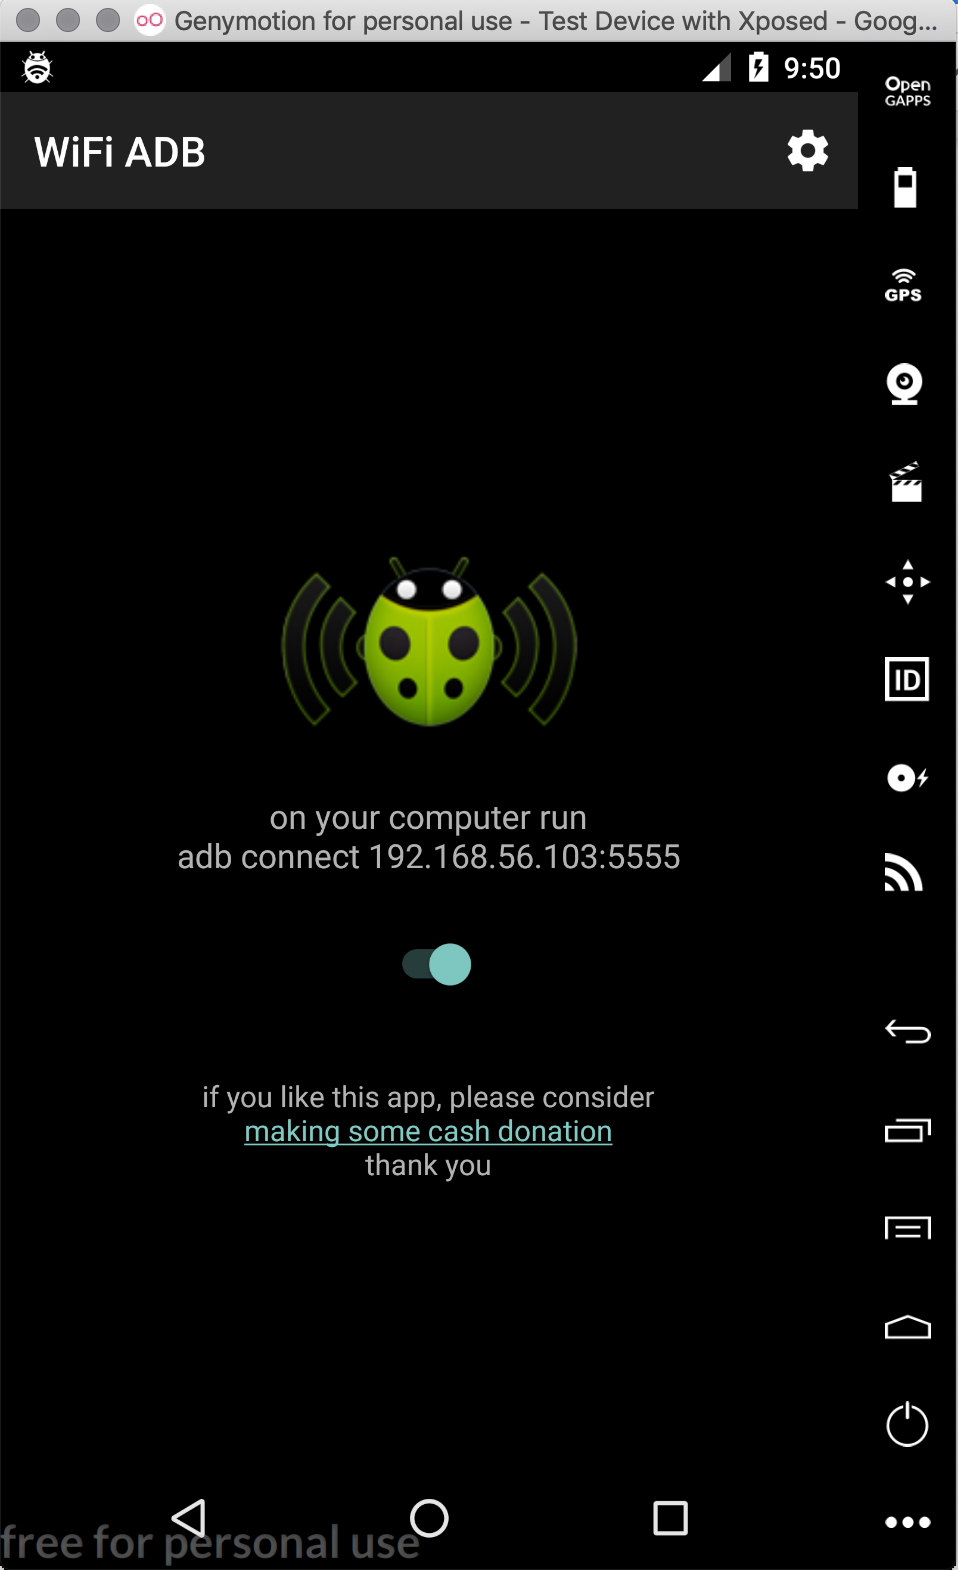
- Now, go to the website https://apkpure.com/ and download the APK for “Wifi ADB” application.
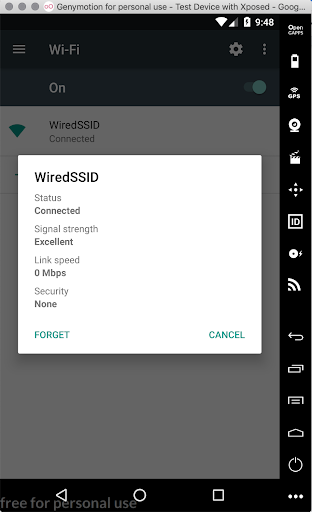
Link: Link: https://apkpure.com/search?q=wifi+adb - Once the apk is downloaded, simply drag and drop the apk over the running Genymotion Device. This will install and launch the application, Wifi ADB. 8.Now, go to setting of Android Emulator → WiFi settings → Forget Wifi.
- Once the wifi has been disconnected, go to Wifi ADB application and select the button to start Wifi over ADB. If asked for Root Permissions → Select Allow or Allow Always.
- Ensure that the ADB is running over a wifi address which is on “Host-only Adapter”, generally it will start with 192.168.X.X
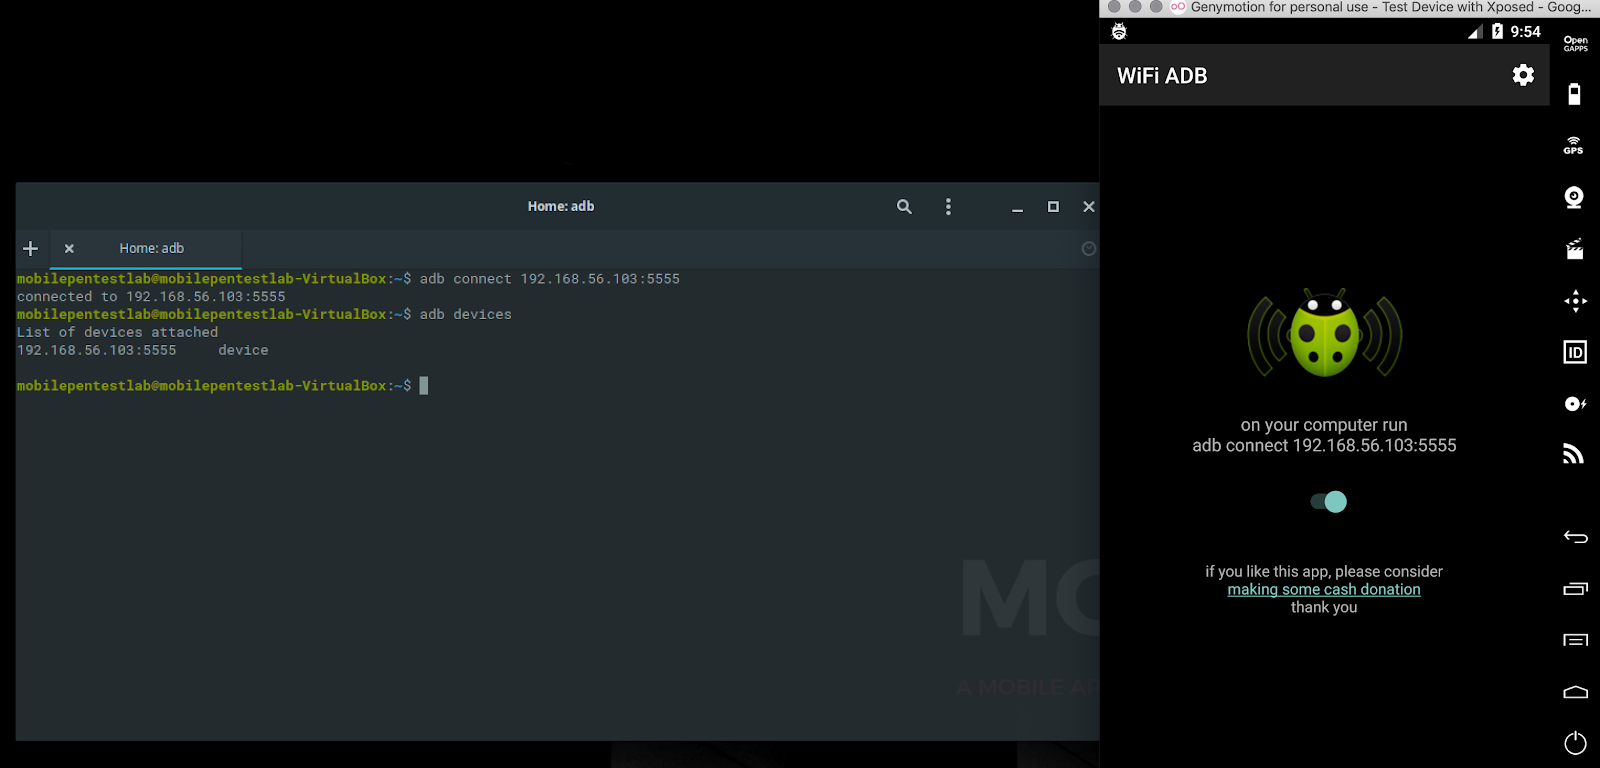
- Go to Mobexler → Launch Terminal from Dock at bottom → Enter the command “adb connect IP:PORT”. Here, IP:PORT is the IP address and port which is showing on Wifi ADB application.
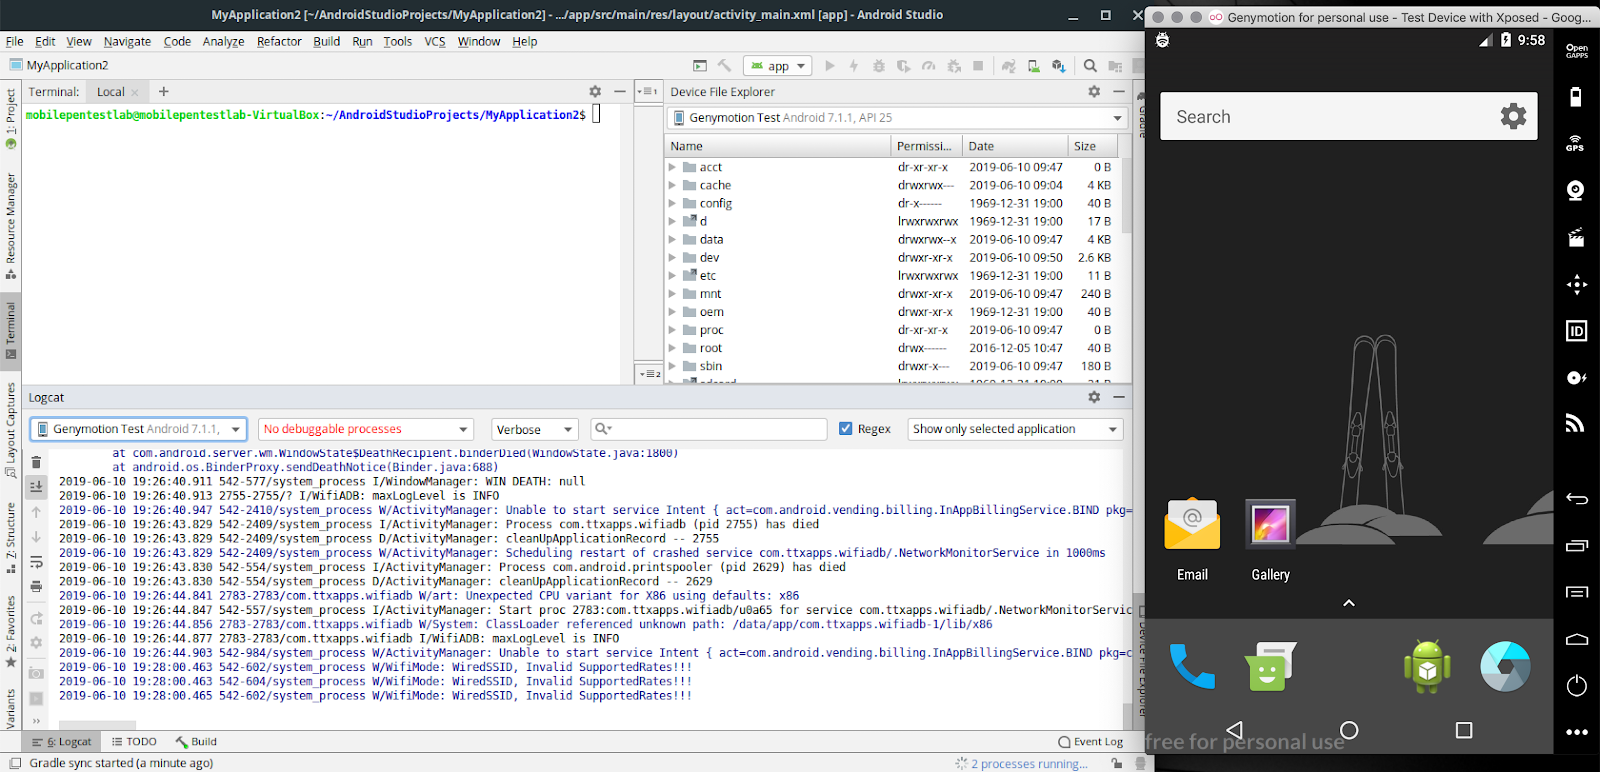
- Launch Android Studio, from Applications → Android Zone → Android Studio.
- Go to the Corellium and register/sign in with your credentials.
- Once done give a name to your project and click on "CREATE DEVICE" Note: Here you are going to choose the mobile device in which you are going to do your testing, scroll using the sliders to find all the devices and choose the most appropriate one which suits your testing purpose. Here we are going to choose Android → Click on Next (Note the same steps are required to build iOS device).
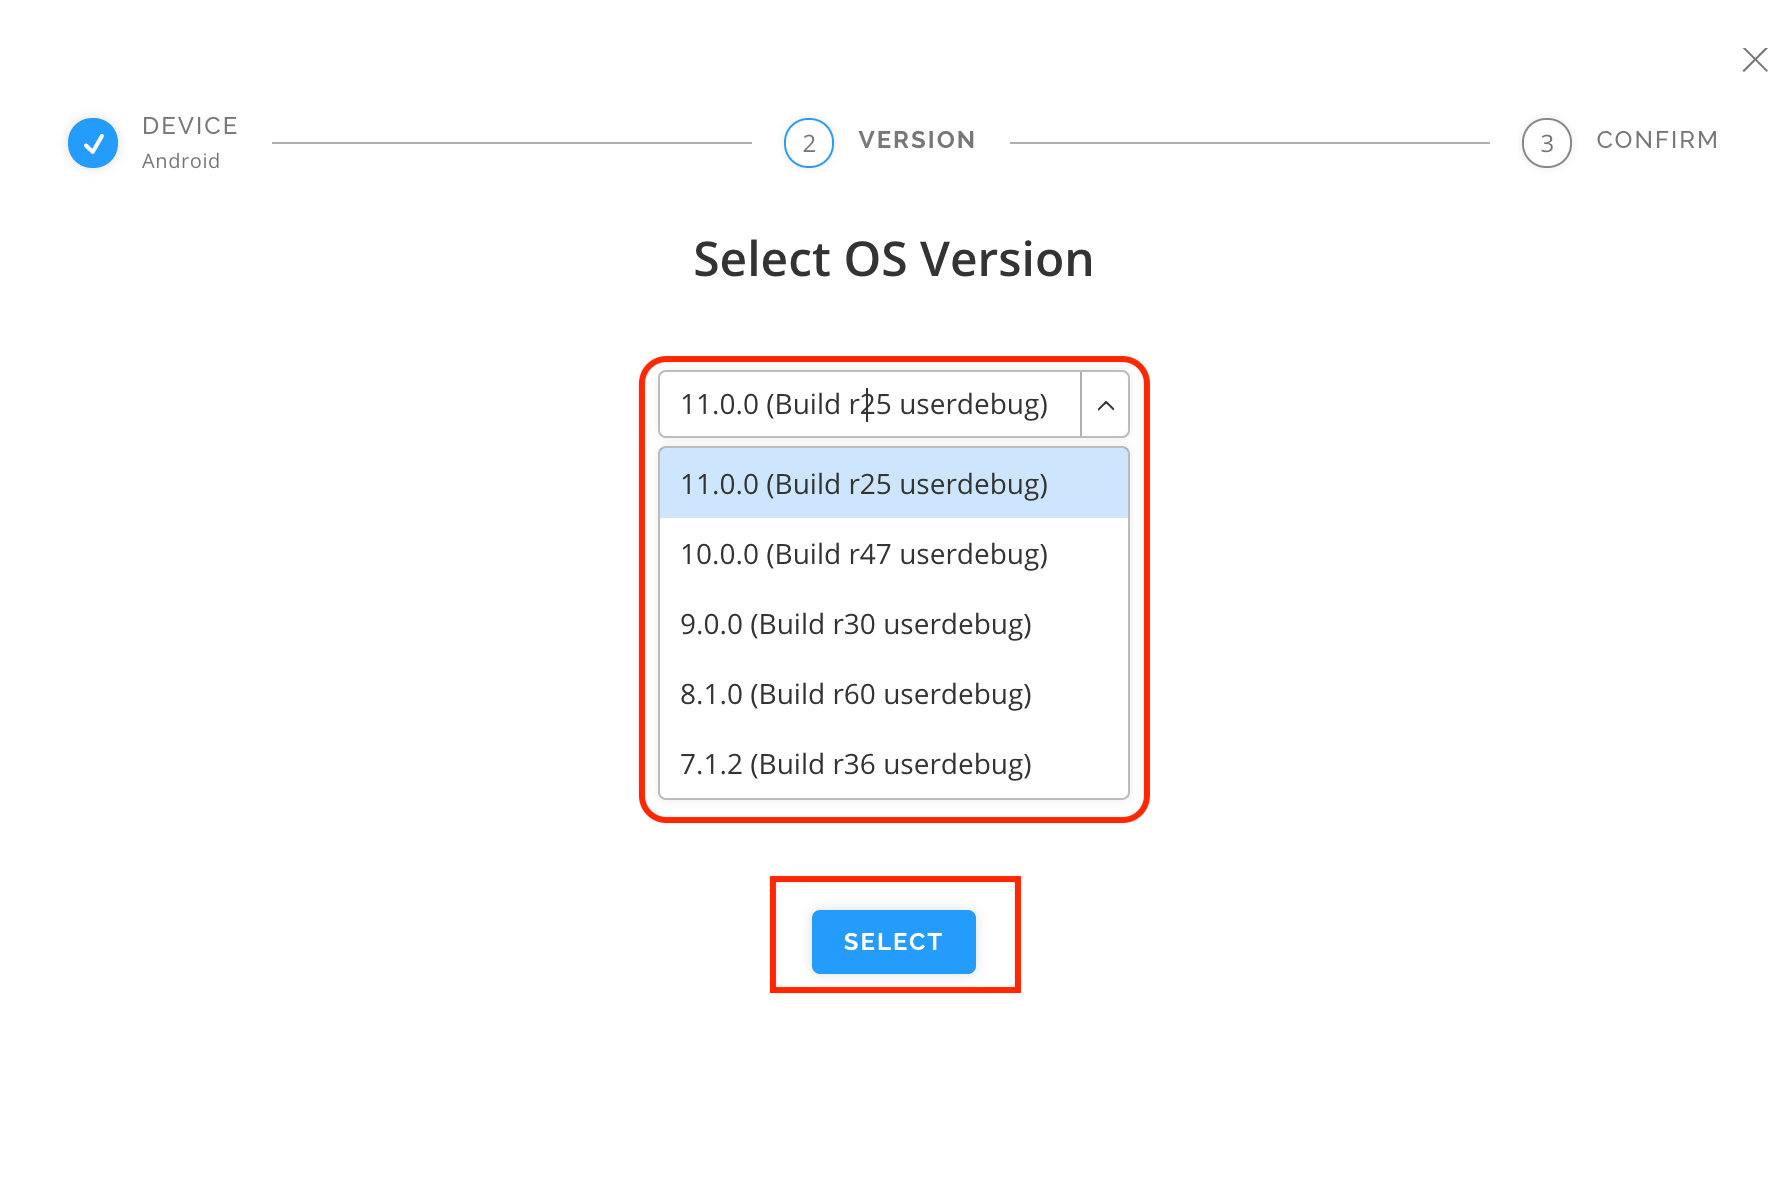
- Select OS Version → Select.
- Give a Device name and in case you need advanced boot options before creating virtual device, you can click on the check box, once done click on "CREATE DEVICE". It will take few seconds to create and build the device.
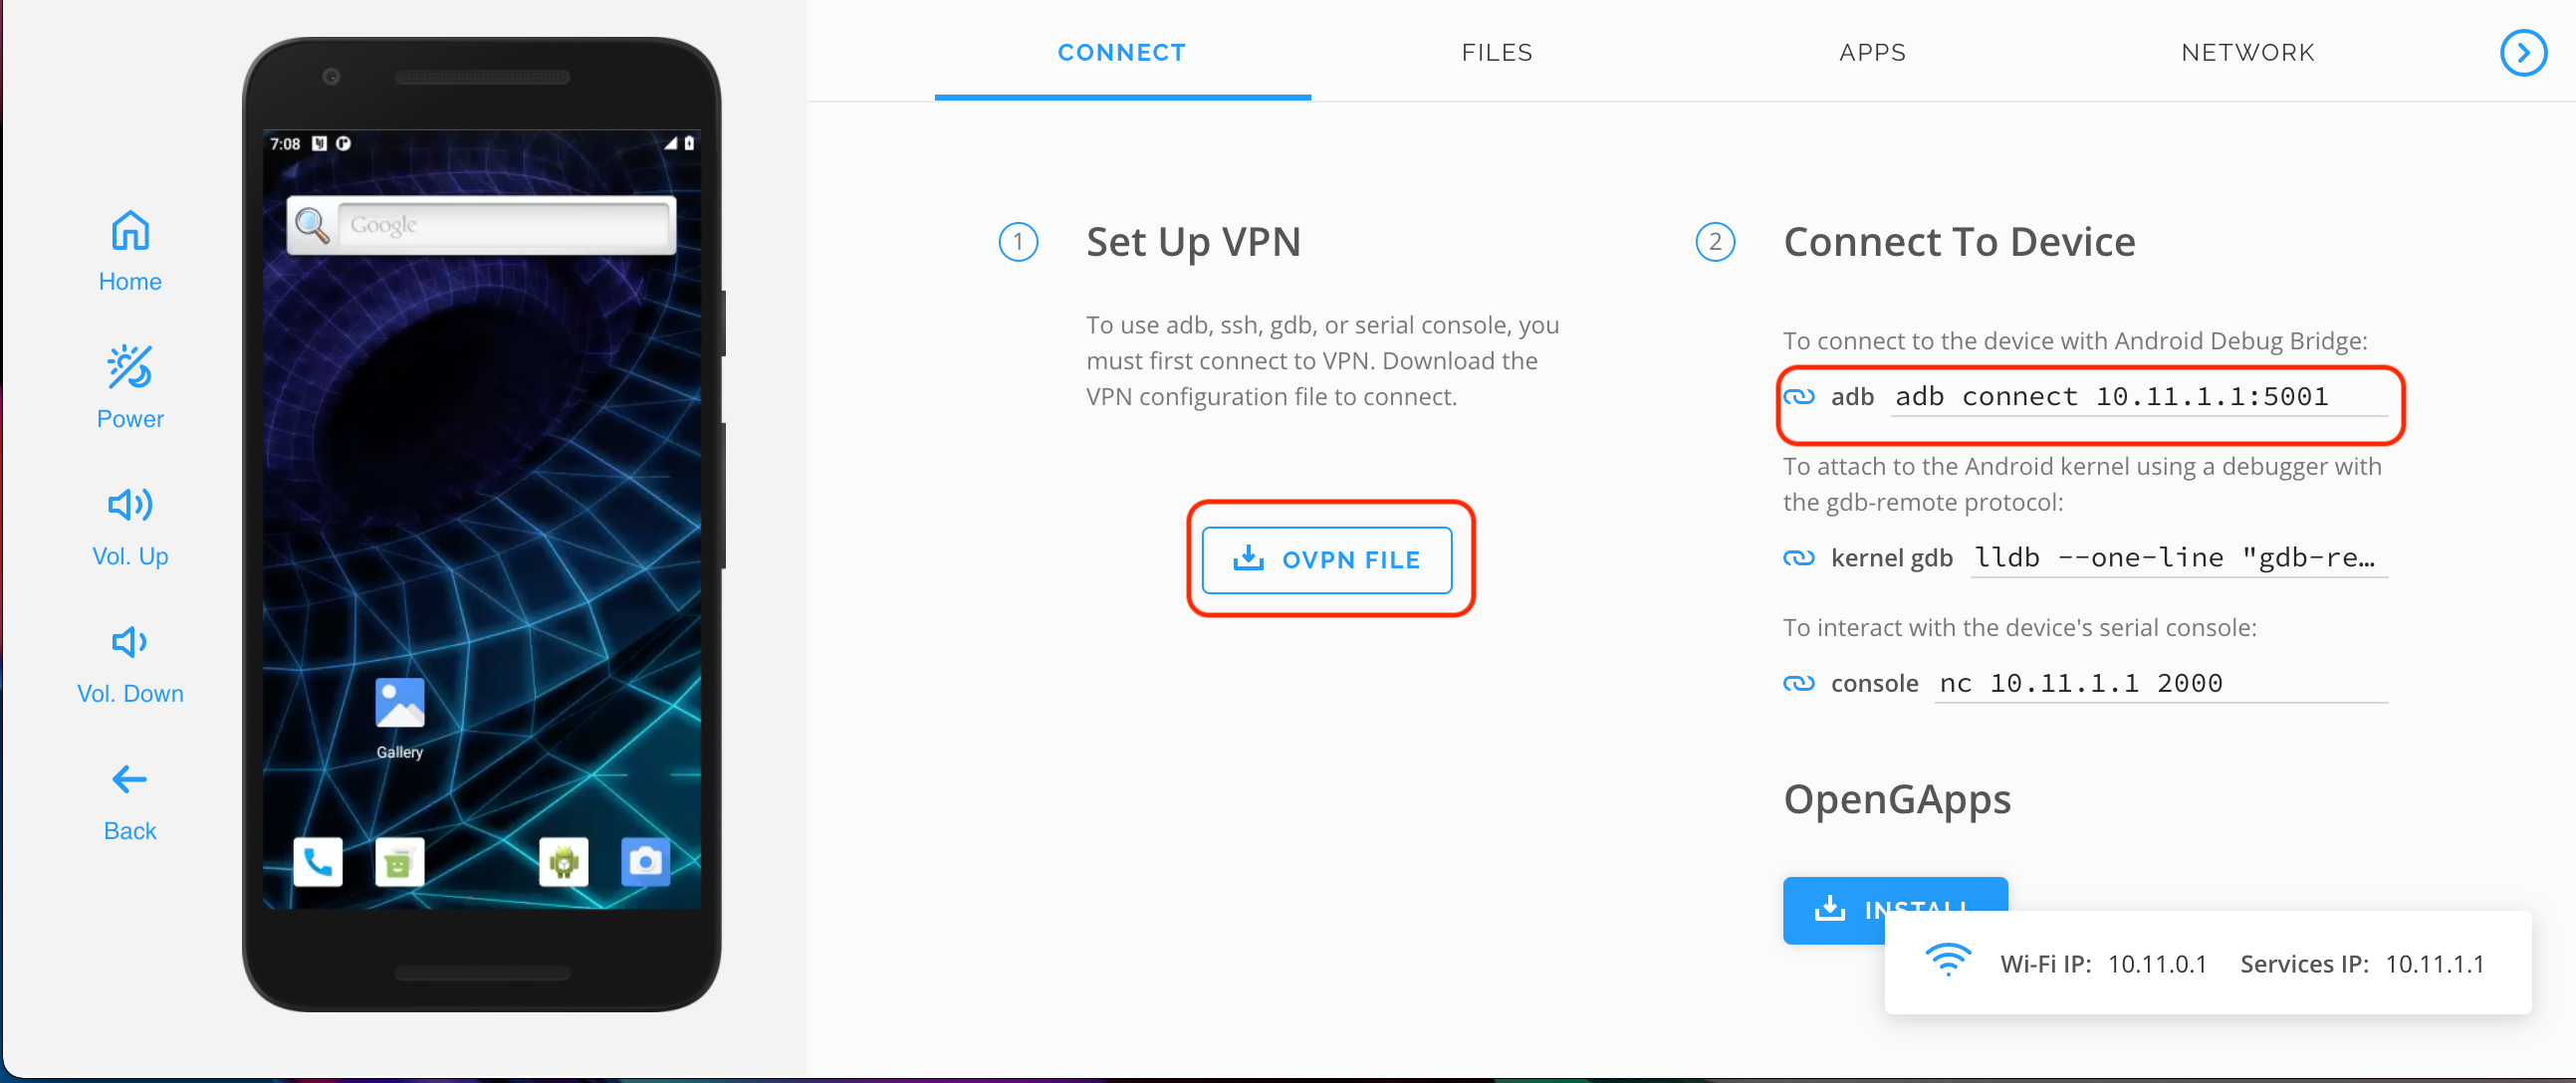
- Now click on "CONNECT TO DISPLAY" inorder to see the display of your device, next click on "OVPN FILE" to download the VPN Configuration file, copy or save the file in your destination folder in Mobexler.
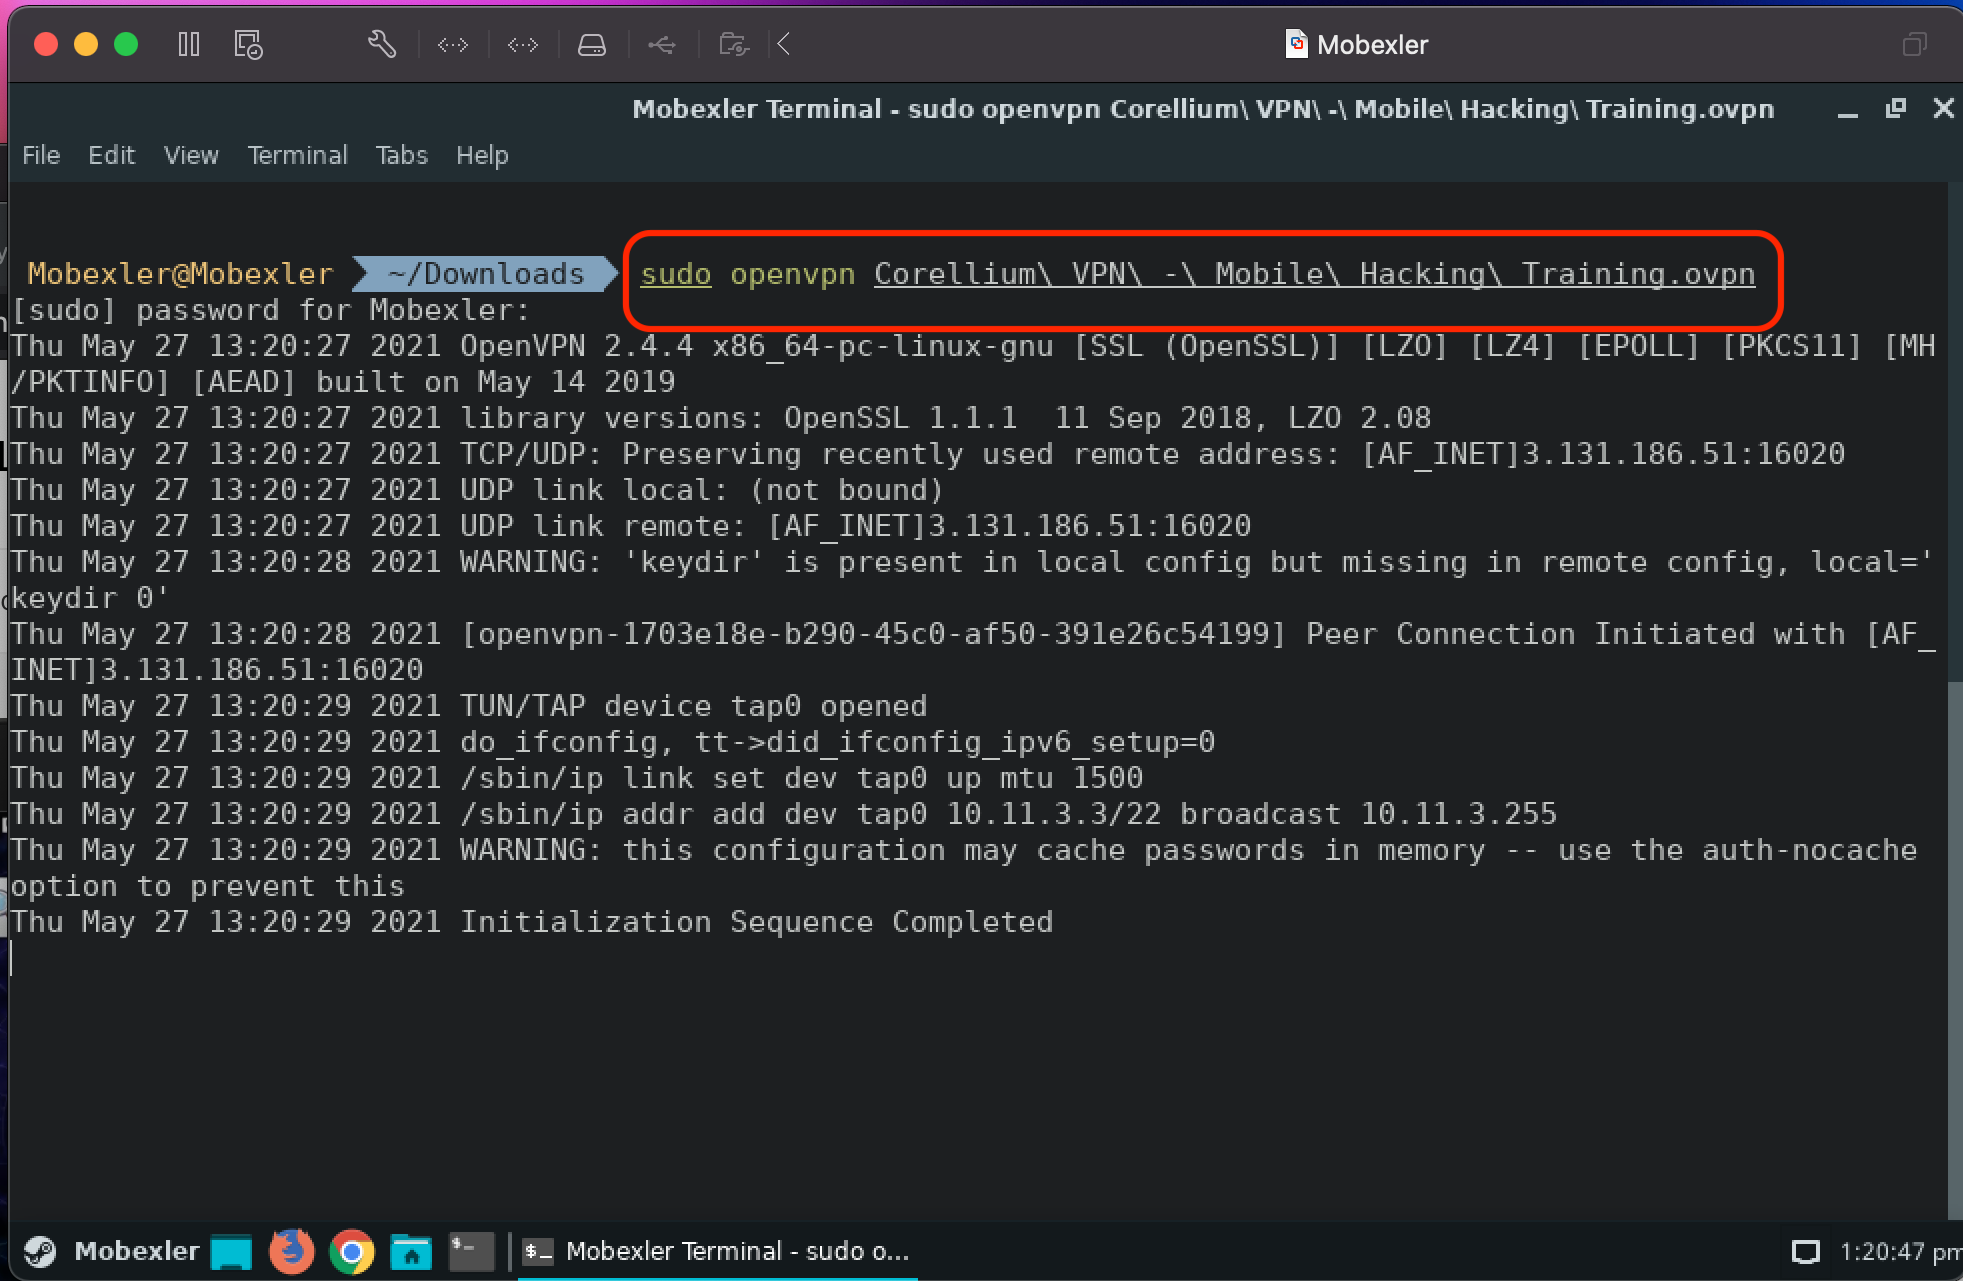
Connect to VPN $: sudo openvpn filename.ovpn - Once the connection is established open new tab (dont close the terminal running the ovpn configuration file) and type " $: adb connect IP:PORT " to connect to the device with android debug bridge.
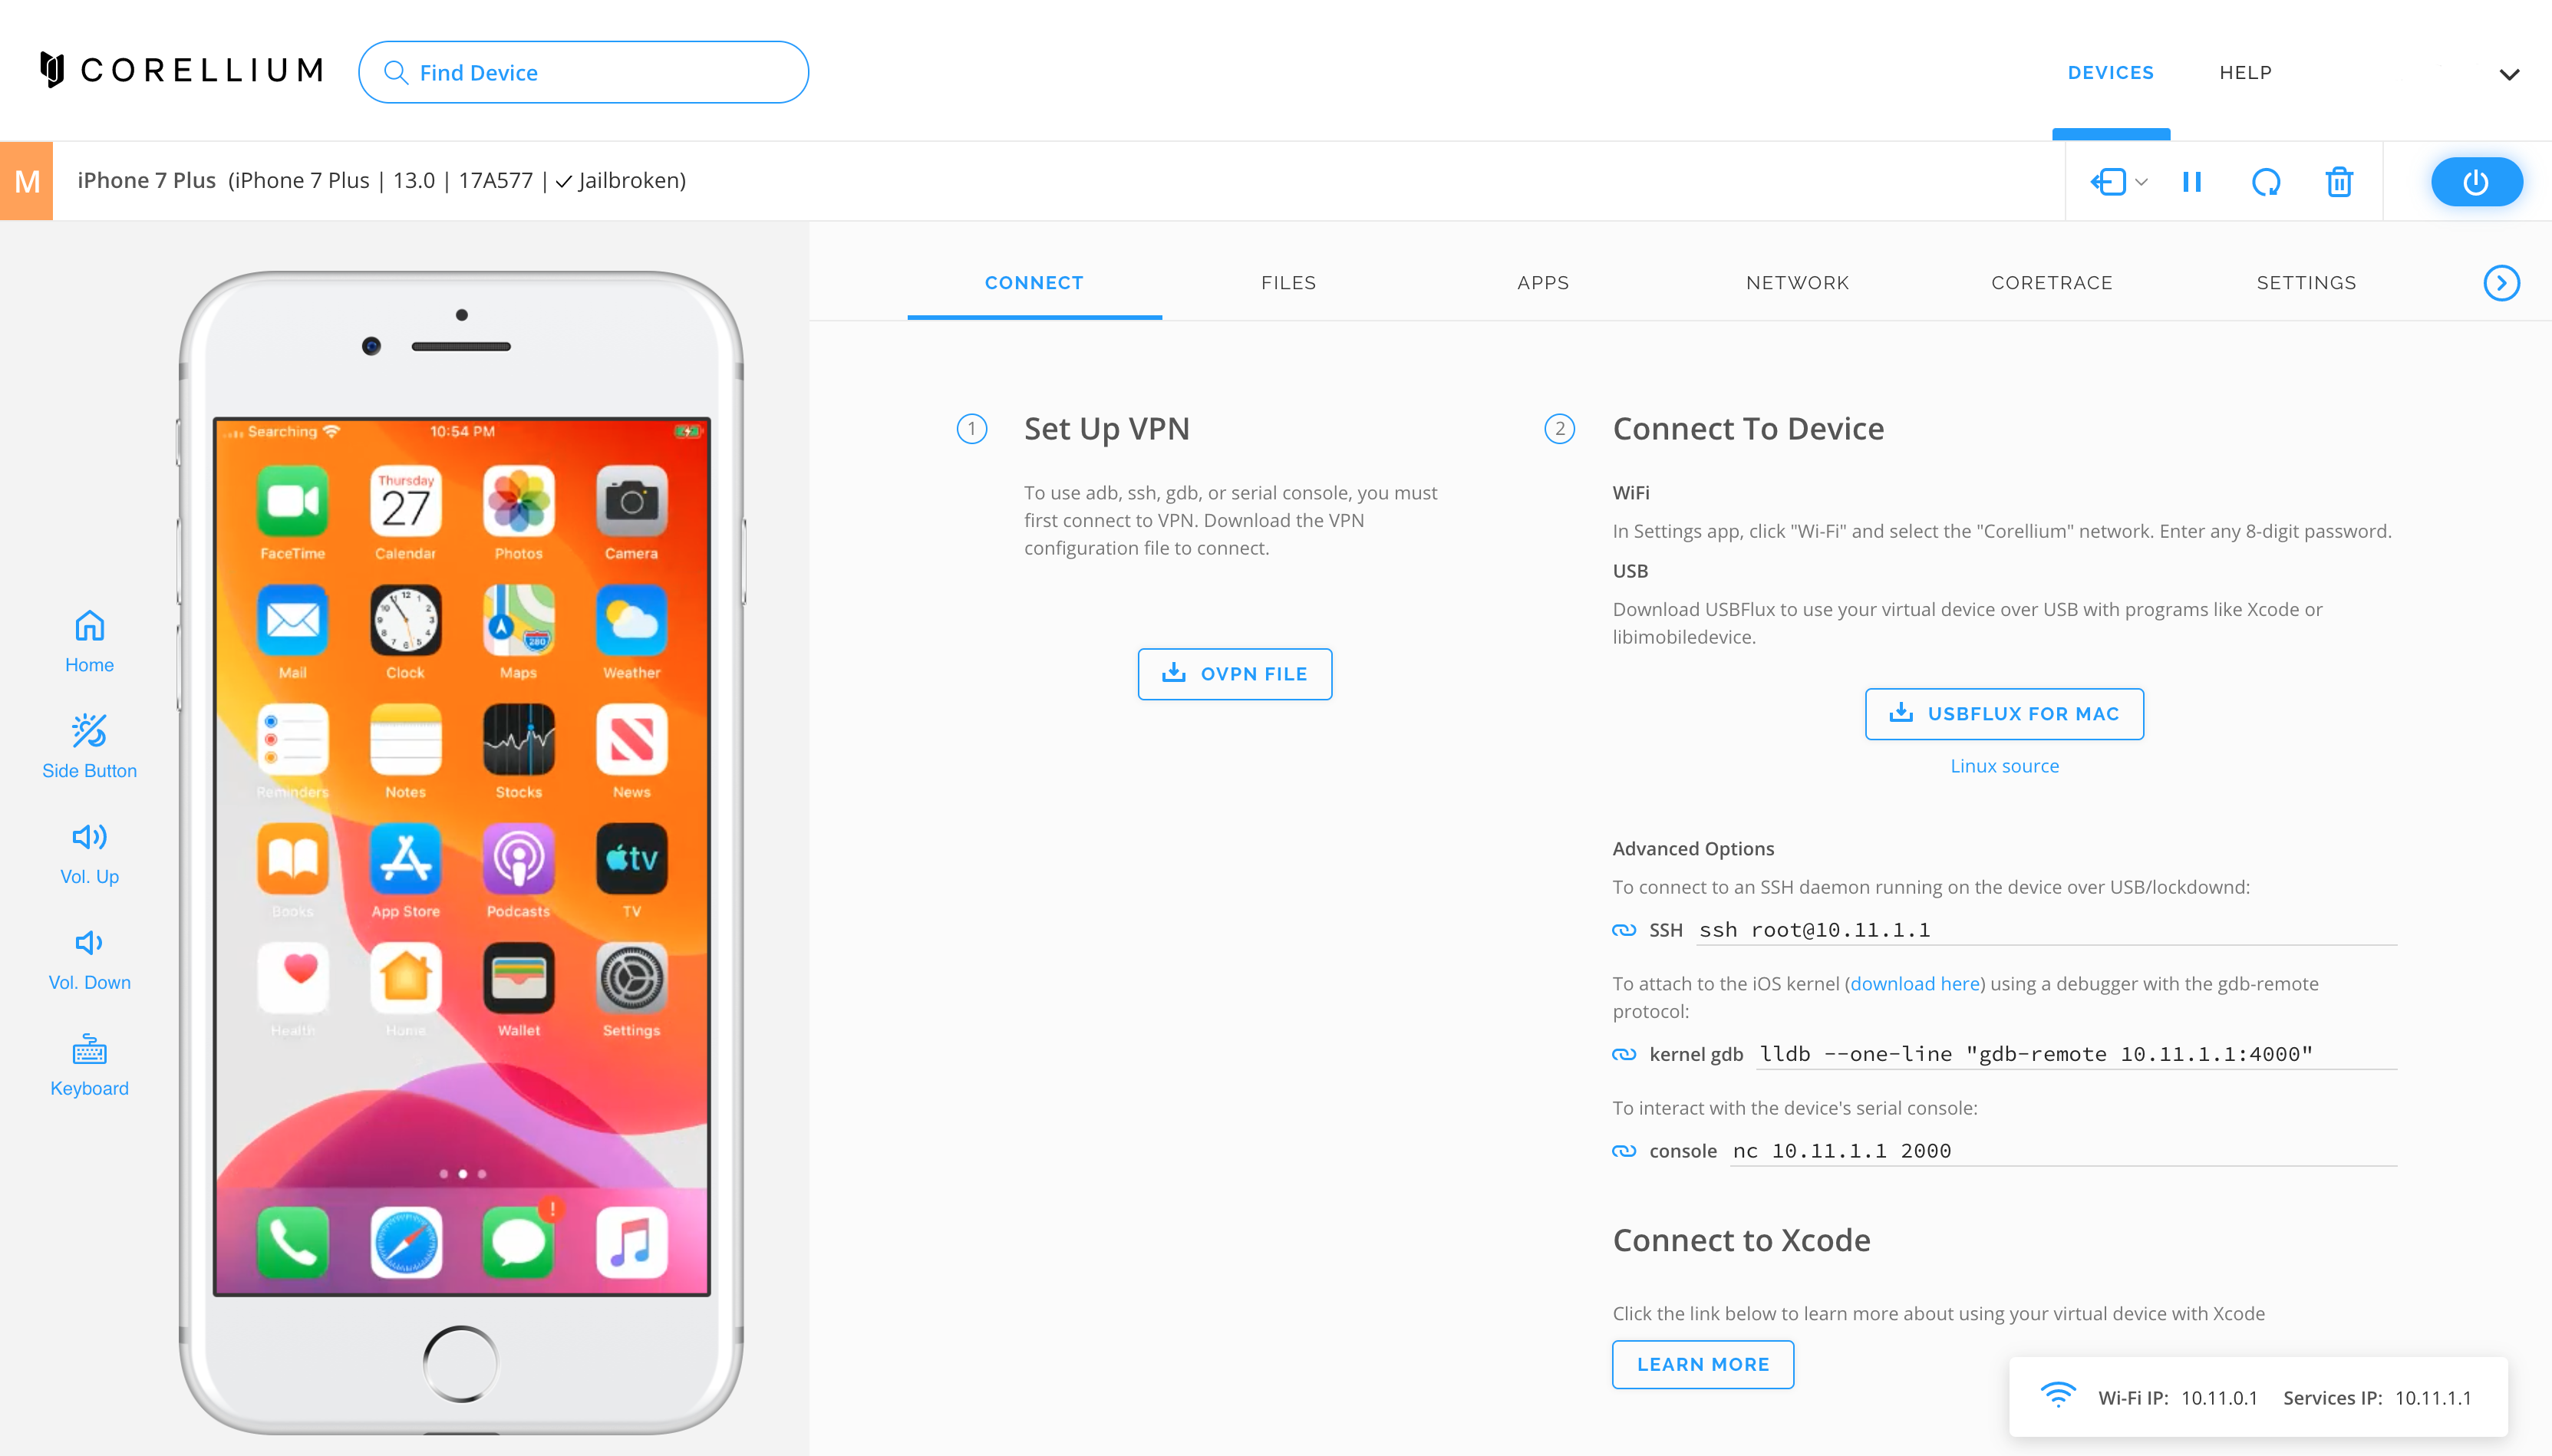
- After creating your iOS mobile device by following the same procedure as mentioned above, and have downloaded the Corellium OVPN file.
- Go to Mobexler → Launch Terminal from Dock at bottom → Enter the command " $: sudo openvpn filename.ovpn " → This would connect Mobexler to the device VPN.
- You can confirm if the VPN is connected properly, by trying to ssh into the device using the command "$: ssh root@10.11.1.1" (where 10.11.1.1 is the device IP).
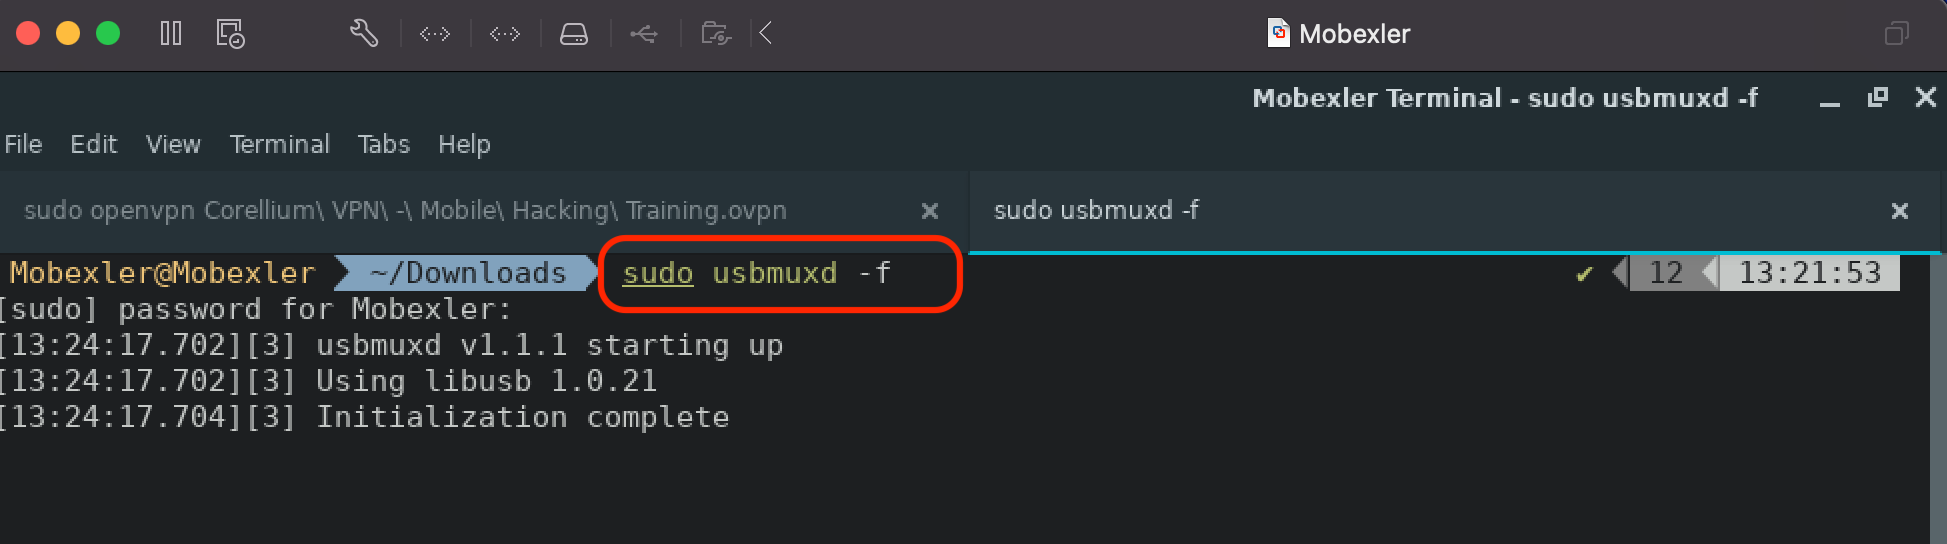
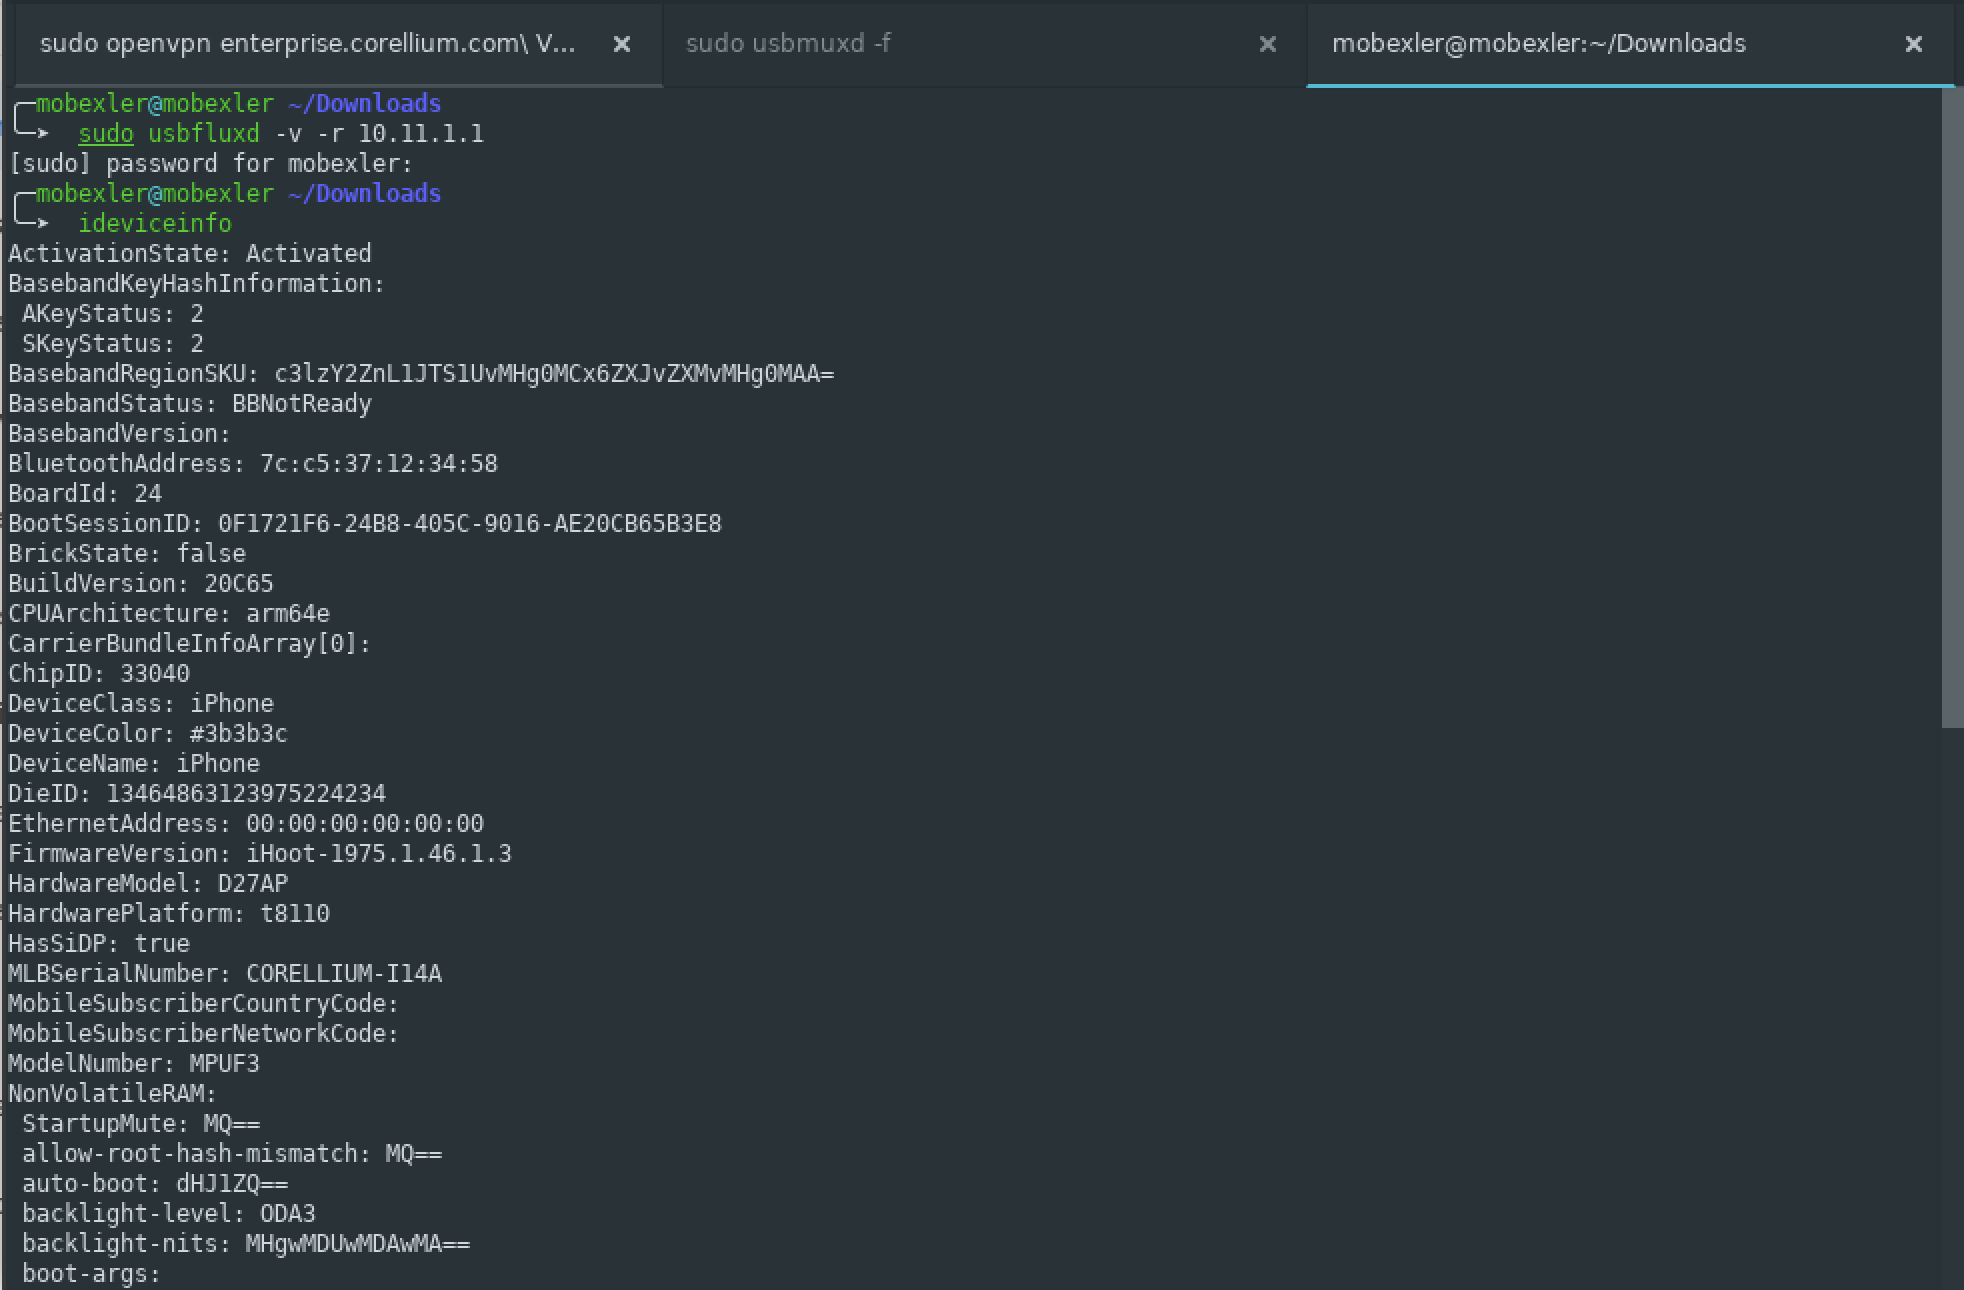
- Now, let's try to connect the device using Usbfluxd. To do this.→ Launch new Terminal, Enter the command " $: sudo usbmuxd -f " to run Usbmuxd in foreground. You can also run "$: sudo systemctl start usbmuxd.service" to start it as a service. followed by " $: sudo usbfluxd -v -r 10.11.1.1" (Where IP is iOS Device IP), in a new terminal
- Once all three connections i.e. VPN, Usbmuxd and Usbfluxd are running and connected, you can run the command "$: ideviceinfo" to fetch the device info as if it was connected over usb.
Integrating Corellium Virtual Devices With Mobexler
Integrating Corellium's Virtual Android Devices With Mobexler


Integrating Corellium's Virtual iOS Devices With Mobexler
Setting Up Penetration Testing Lab Using Mobexler(Video Content)
Everything You Need to Know About Mobexler
Setting Up Mobile Peneteration Testing Environment Using Mobexler
Importing Mobexler virtual machine in VirtualBox